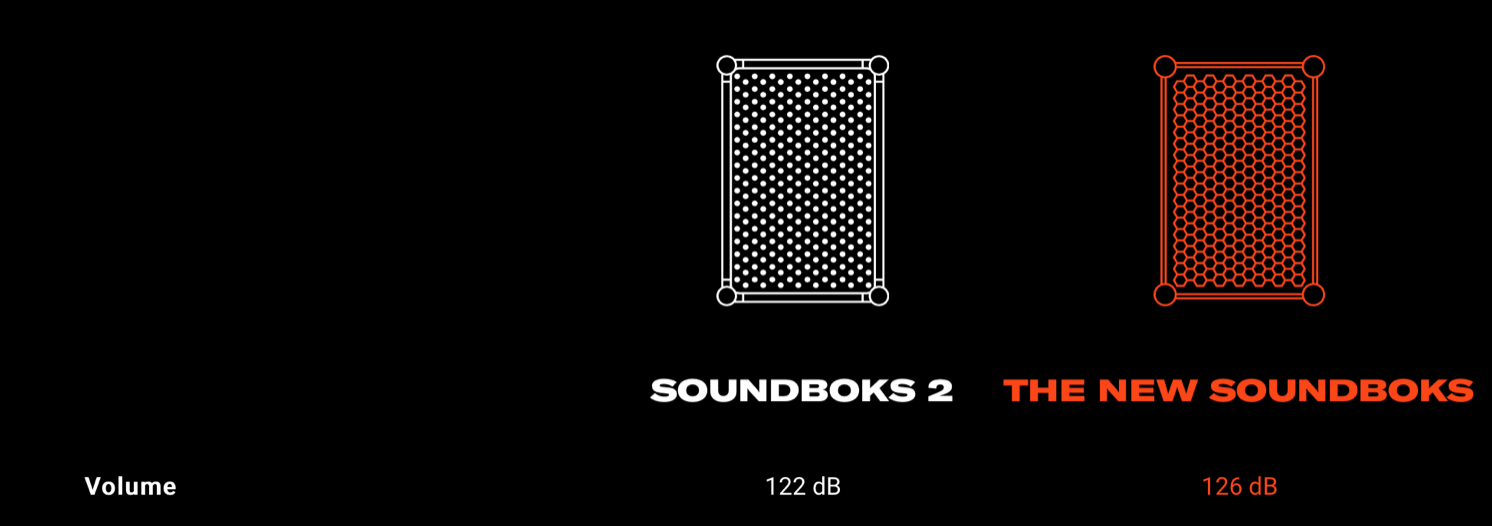
Back by popular demand. Here’s how I designed the electronics to power the 120 dBSPL (@ 1m, ±3dB 40Hz-20kHz) beast to defeat the new generation of super mid “Soundboks” type devices.

As you can tell there are some peculiarities to this design, including a dual battery rails supporting the “low power” section.
POWER
THE AMP
The first thing to do is to down-select the amplifier chip-set to deliver the hundreds of watts required to hit target levels.
There are very few amplifiers in this power range that will meet this need.
- IRS 2092 with ±50V rails and adequate MOSFETs
- ruled out for the reason that I don’t want to source ±50V
- WONDOM AA-AB31395: 1 X 1000Watt Class D Audio Amplifier Board – T-AMP – LV
- Out because 500W into 4 Ohms @ 10% THD @ 60V
- No THD/Power curves
- WONDOM AA-AB35511 3 X 500Watt Class D Audio Amplifier Board – T-AMP
- Out because it actually can only sink 300W into 3 ohms @ 50V @ 10% THD
- ICEpower 300A1: single channel 300W @ 1% THD @ 55V
- this is a strong contender, but it’s single channel and requires a ±12V input and is therefore slightly more expensive and complicated than the TPA3255
- ICE Power 500ASP
- Honestly more than perfect but requires 120V AC
- ICEpower 300A2
- Also an incredible amp but requires ±35-65V which is annoying with batteries
- TPA3255 Capable of 500W into 4 ohms (PBTL) @ 50V @ 1% THD
- best contender
- 3e-audio sells a balanced input version which is great for low noise!
The TPA3255 chip-set is the winner here for cost and simplicity while maintaining high quality.
In my experience, a lot of these amps will “overspec” their power output, as they’ll rate their amp in a very specific set of conditions. Let’s dive further into the TPA3255 to confirm it can meet our needs. There are a few dimensions we care about:
- power required by speaker to hit target SPL
- impedance of speaker at frequencies of highest power
- voltage/current required by amplifier at highest power
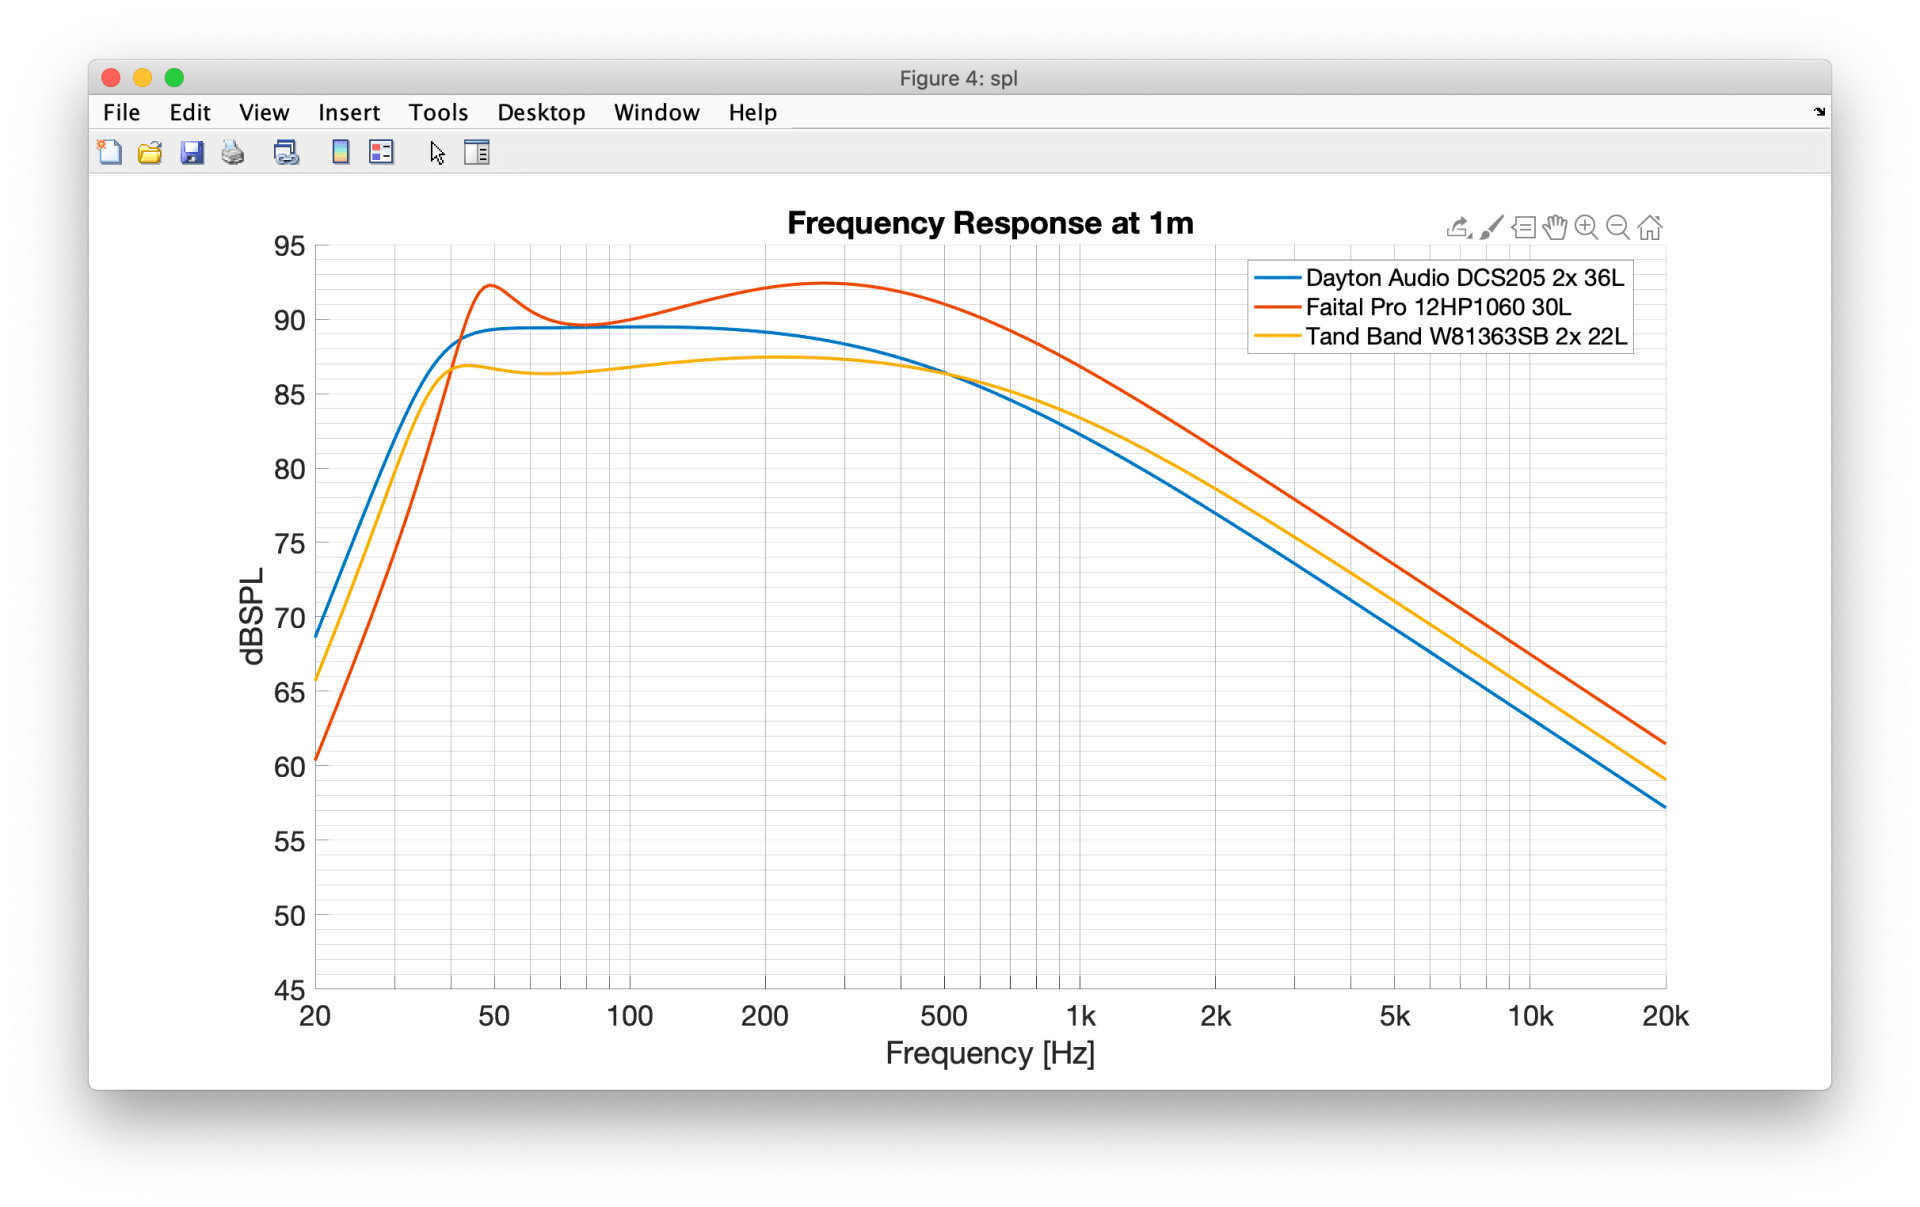
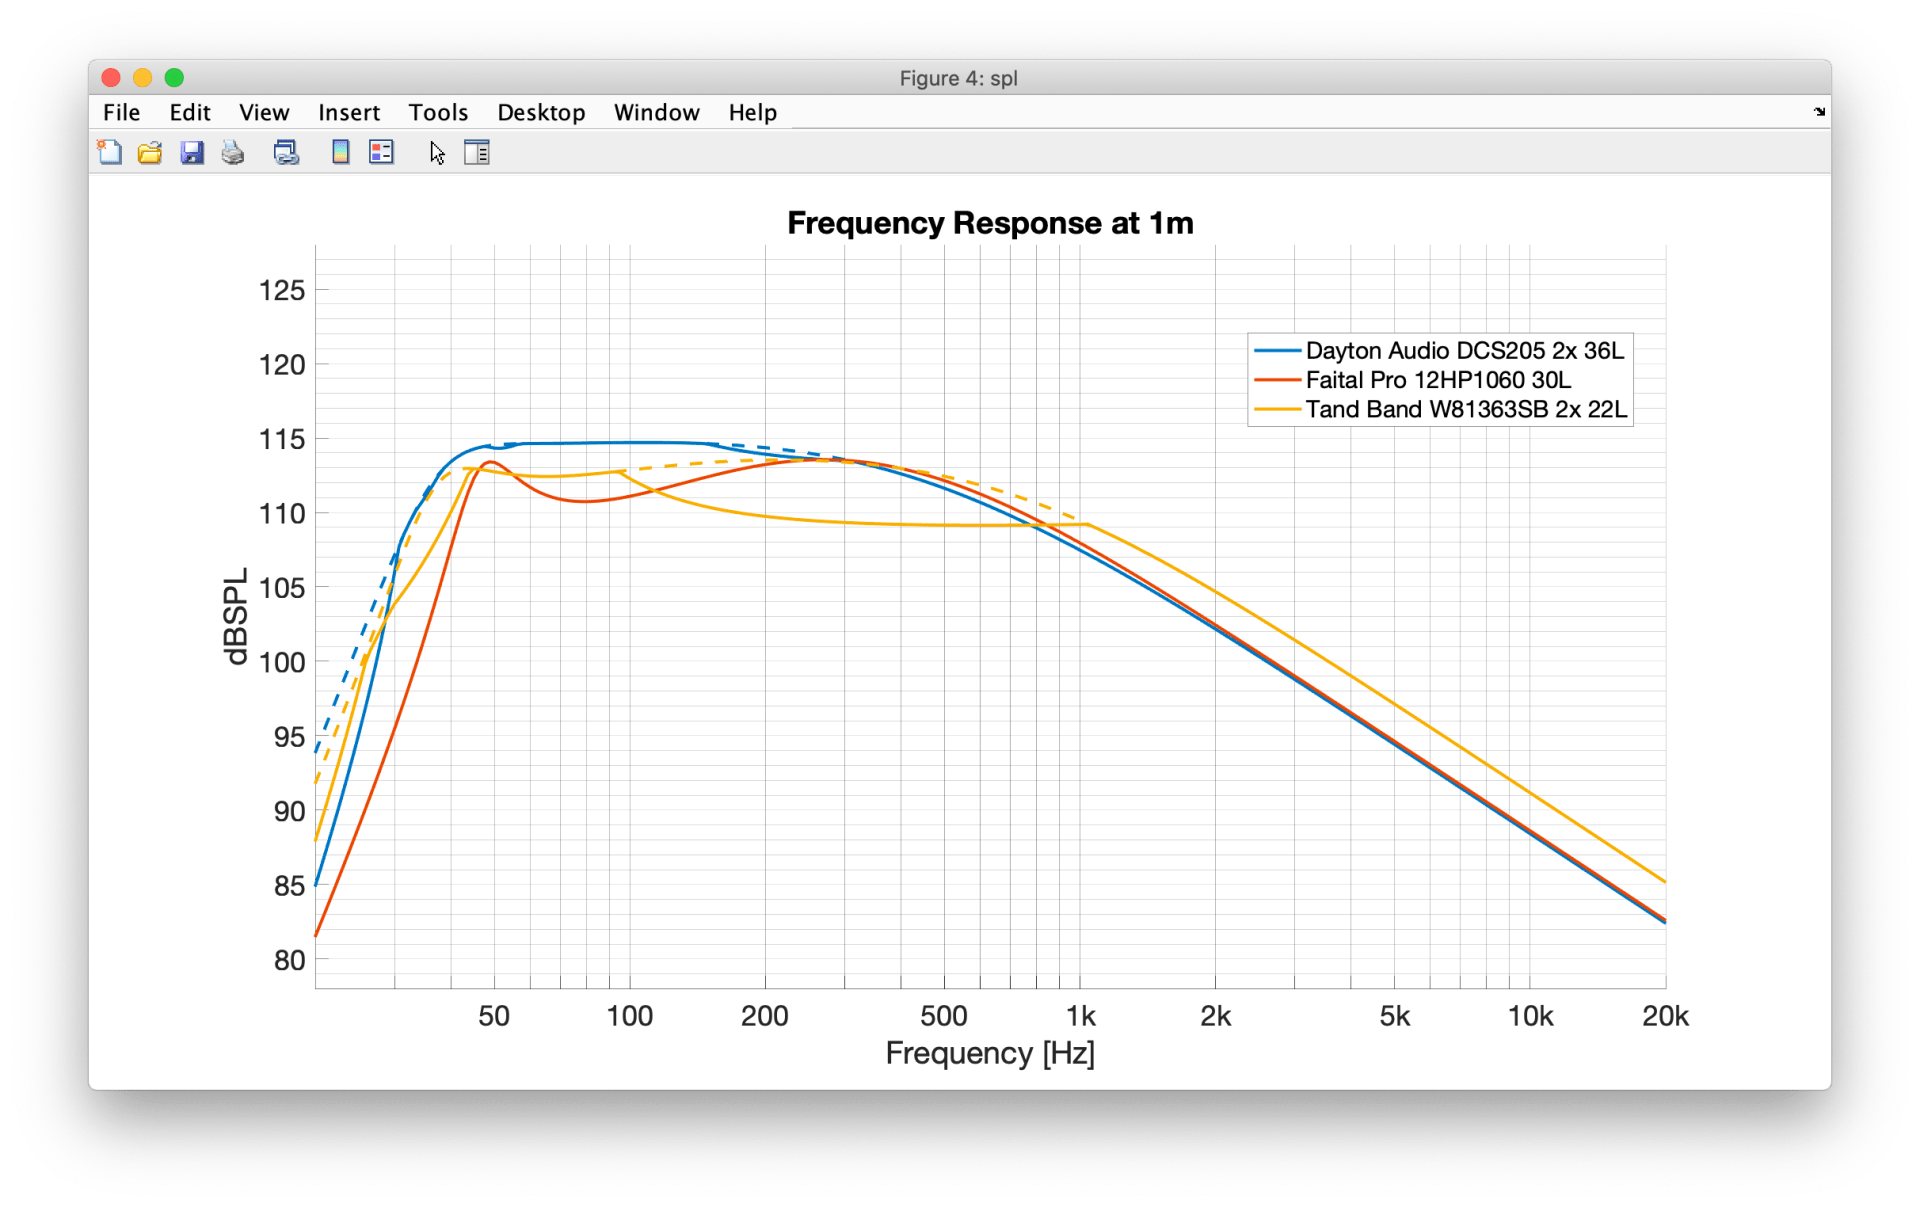
Woofers are almost always the least efficient and most power intensive part of an acoustic system, so we’ll focus on the woofers for now. To determine “how much power into what impedance” we refer to the target response from the simulation in part 1 and check power required and impedance:
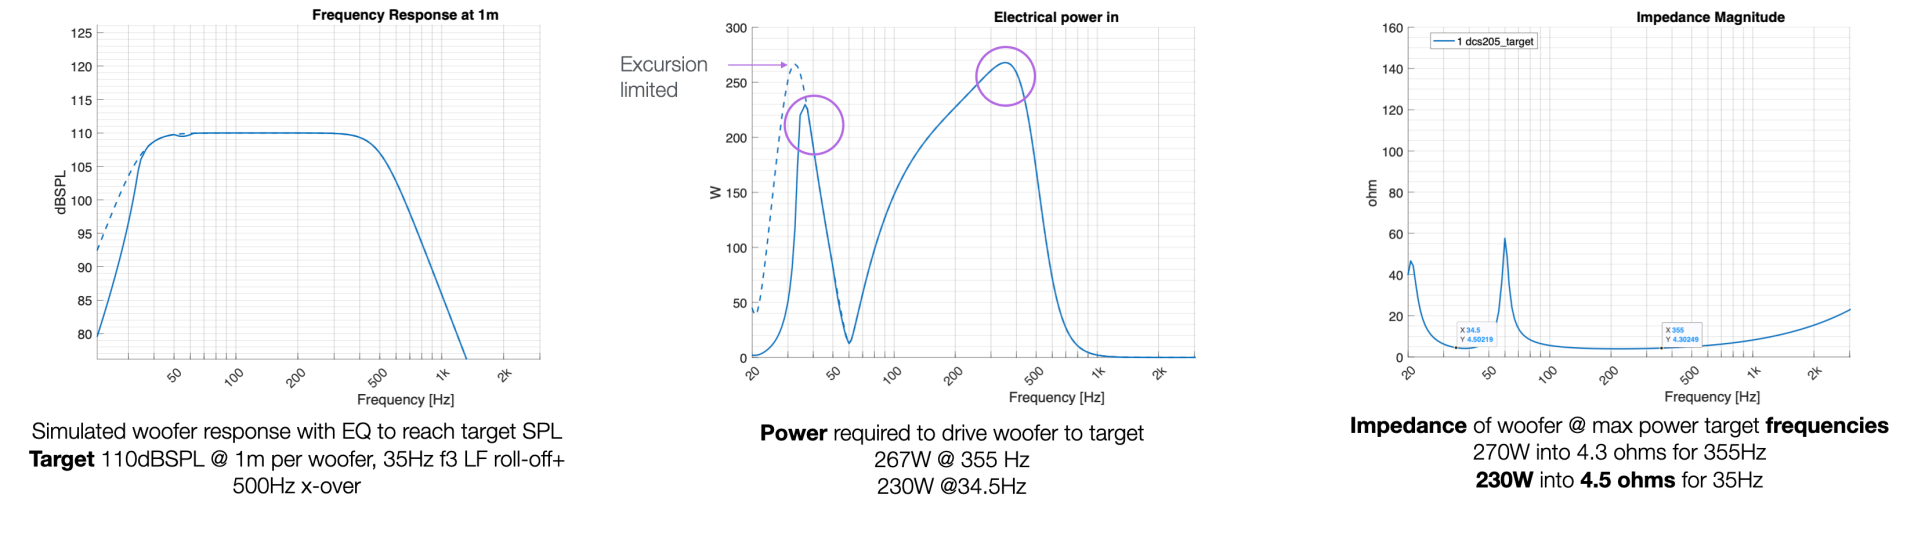
So we need 270W into 4.3 ohms at 355Hz and 230W into 4.5 ohms at 35 Hz! Then we refer to the TPA3255 data sheet to determine if it can deliver that power:

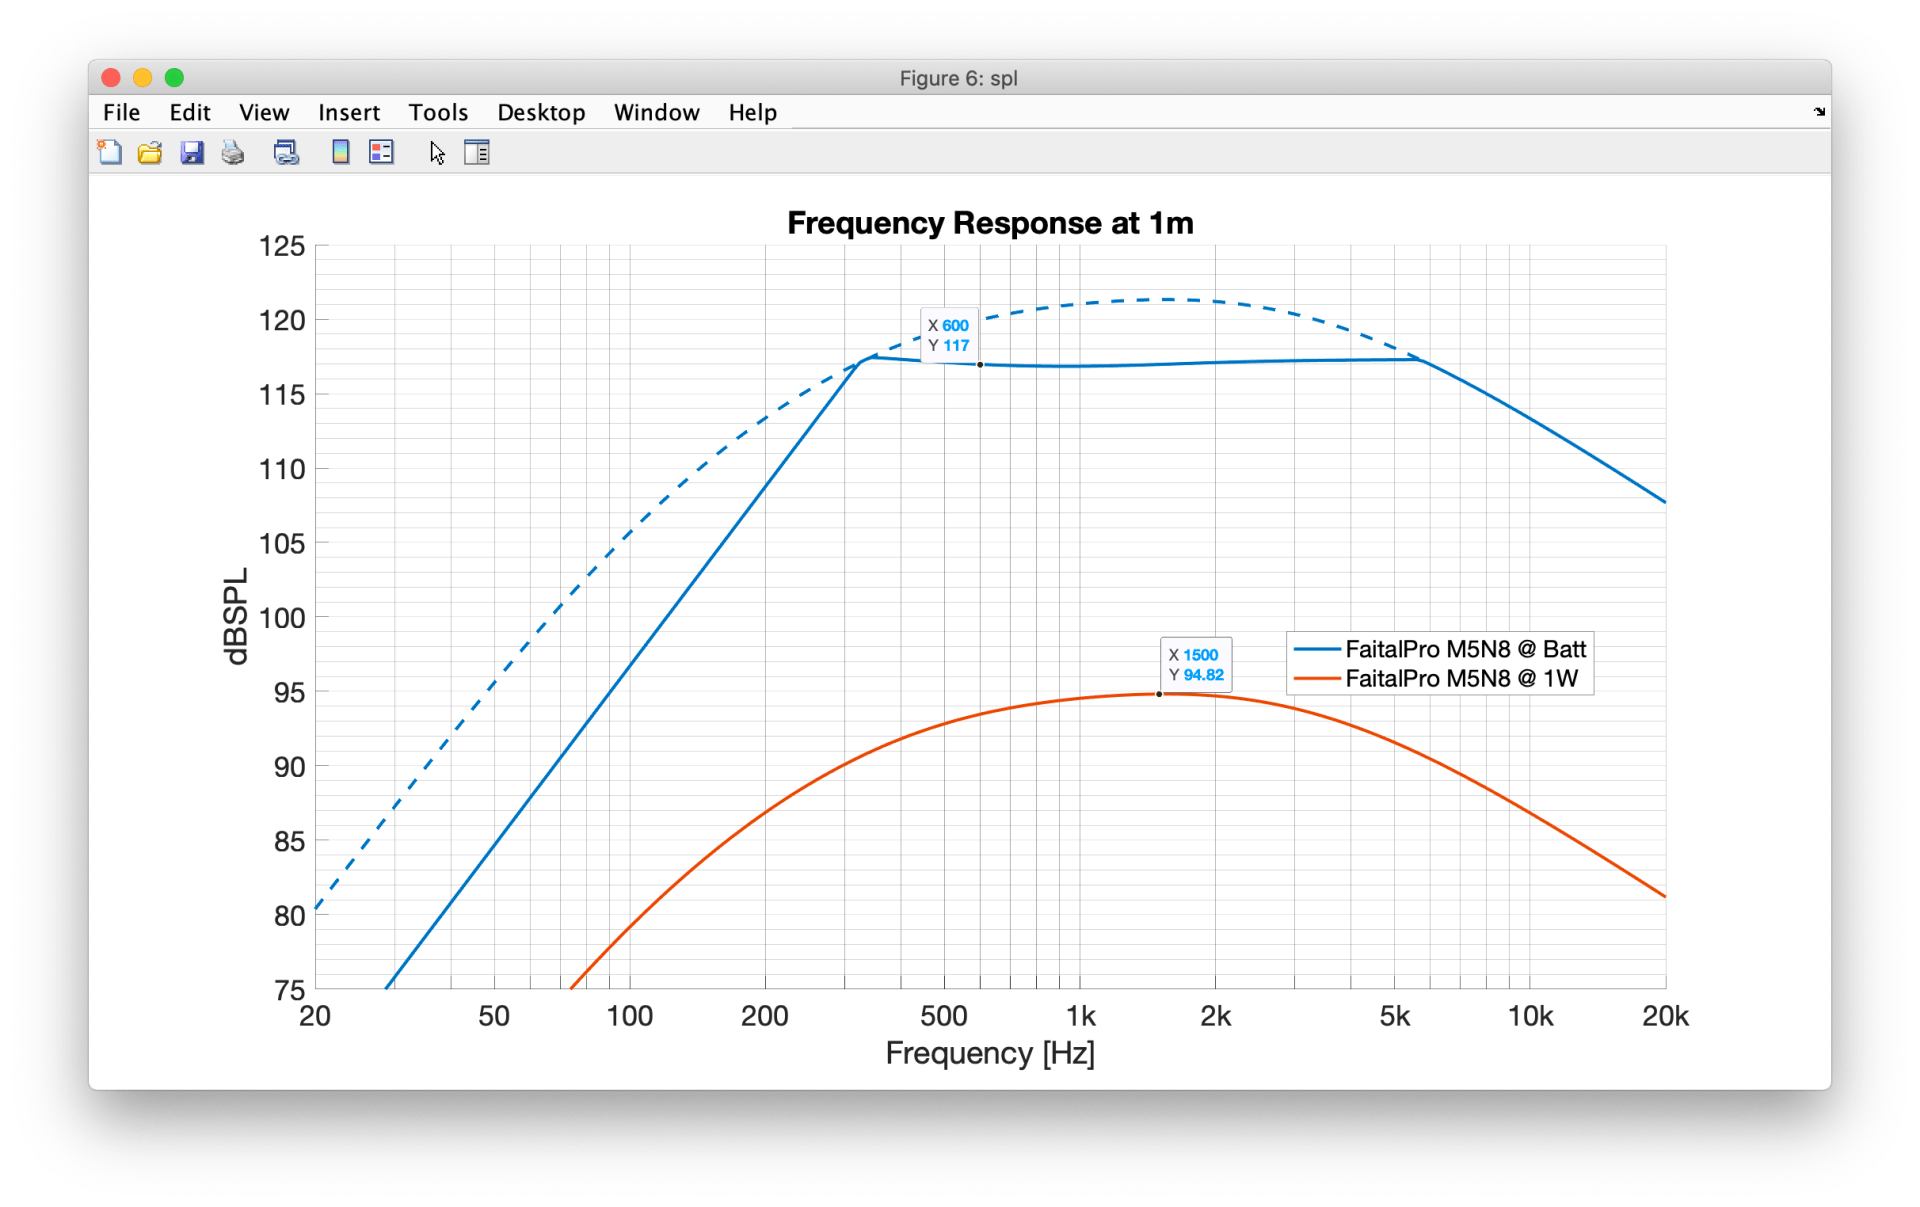
Based in the data sheet, it looks like we can do 260W into 4 ohms, which is precisely 231W into 4.5 ohms—perfect!. The amp will not be able to deliver the full power required at 355Hz, but that’s OK—that’s firmly in the lower vocal range, where I expect less general signal level in normal use. The data sheet also informs us that the amplifier expects 54V to deliver this wattage. We can then refer to the efficiency curves to understand the maximum current the amplifier will draw:

Based on these two graphs we can expect that for two woofer channels we’ll be looking at a maximum power draw of about 700W. We can apply this same process to the mid-range and tweeter to determine the total power draw of all 4 channels of this speaker, but to cut to the chase, we’re looking at a power draw of about 1kW peak.
From Ohms law, we can determine that 1000W at 54V is about 18 Amps, which we’ll use to spec the power supply portion. For now, we can be confident that the TPA3255 amplifier will suit our needs.
3e-audio’s TPA3255 boards are also beautiful, compact and expensive. Here they are in the (as typical for every project I do) completely undersized electronics box.

THE BATTERY
Based on the acoustic simulations above, the power draw for the whole system looks something like this:

The peak load of about 1kW is an absolute maximum— all of the driver’s stated power handling exceeds their actual linear excursion (in simulation). We need to be able to deliver 1kW for transients but an actual input (sine wave being the worse case equating to 1kW peak) would destroy the speakers rather quickly. I accidentally verified this fact when I mis-programmed the DSP, which caused it to output full-scale white noise; the tweeter burnt immediately. Armed with this knowledge, I can happily specify a 48V 1kW battery to handle the peak demands. The continuous load—i.e. the crest factor (or the ratio between the RMS value and peak value of a signal)—for very loud music content will be <-10dB below this peak, so the battery will be chillin’. Not only is -10dB the 99th percentile of music loudness (more on this later), but most playback environments (e.g. Spotify) have a metadata normalization scheme that limits CF to < -14dB.
Moving on to runtime, my target was “a while” at max volume, 6 hours for party usage and ~all day for normal-to-loud listening levels. I added a quick calc in the bottom of the power table—a typical battery capacity in the 48V range is 20Ah, which yields about 2.75 hours at maximum power output with music, and 5.63 hours at a click or two down from that (-6dB). Keep in mind, this is still using -10dB CF, which is, like, hella loud. For reference, the crest factor of a loud metal song like System of a Down’s “Take the Power Back” is -14.2dB. Taking that into account, 20Ah seems like a reasonable capacity.
Writing this from the perspective of having already built the device and used it for parties, the battery life is great. Max volume is enough to irritate the house next door and more than enough to cover a 30 person party on the beach, the battery typically lasts for about 6 hours in this usage, so -10dB CF is certainly a very aggressive estimator for battery life.
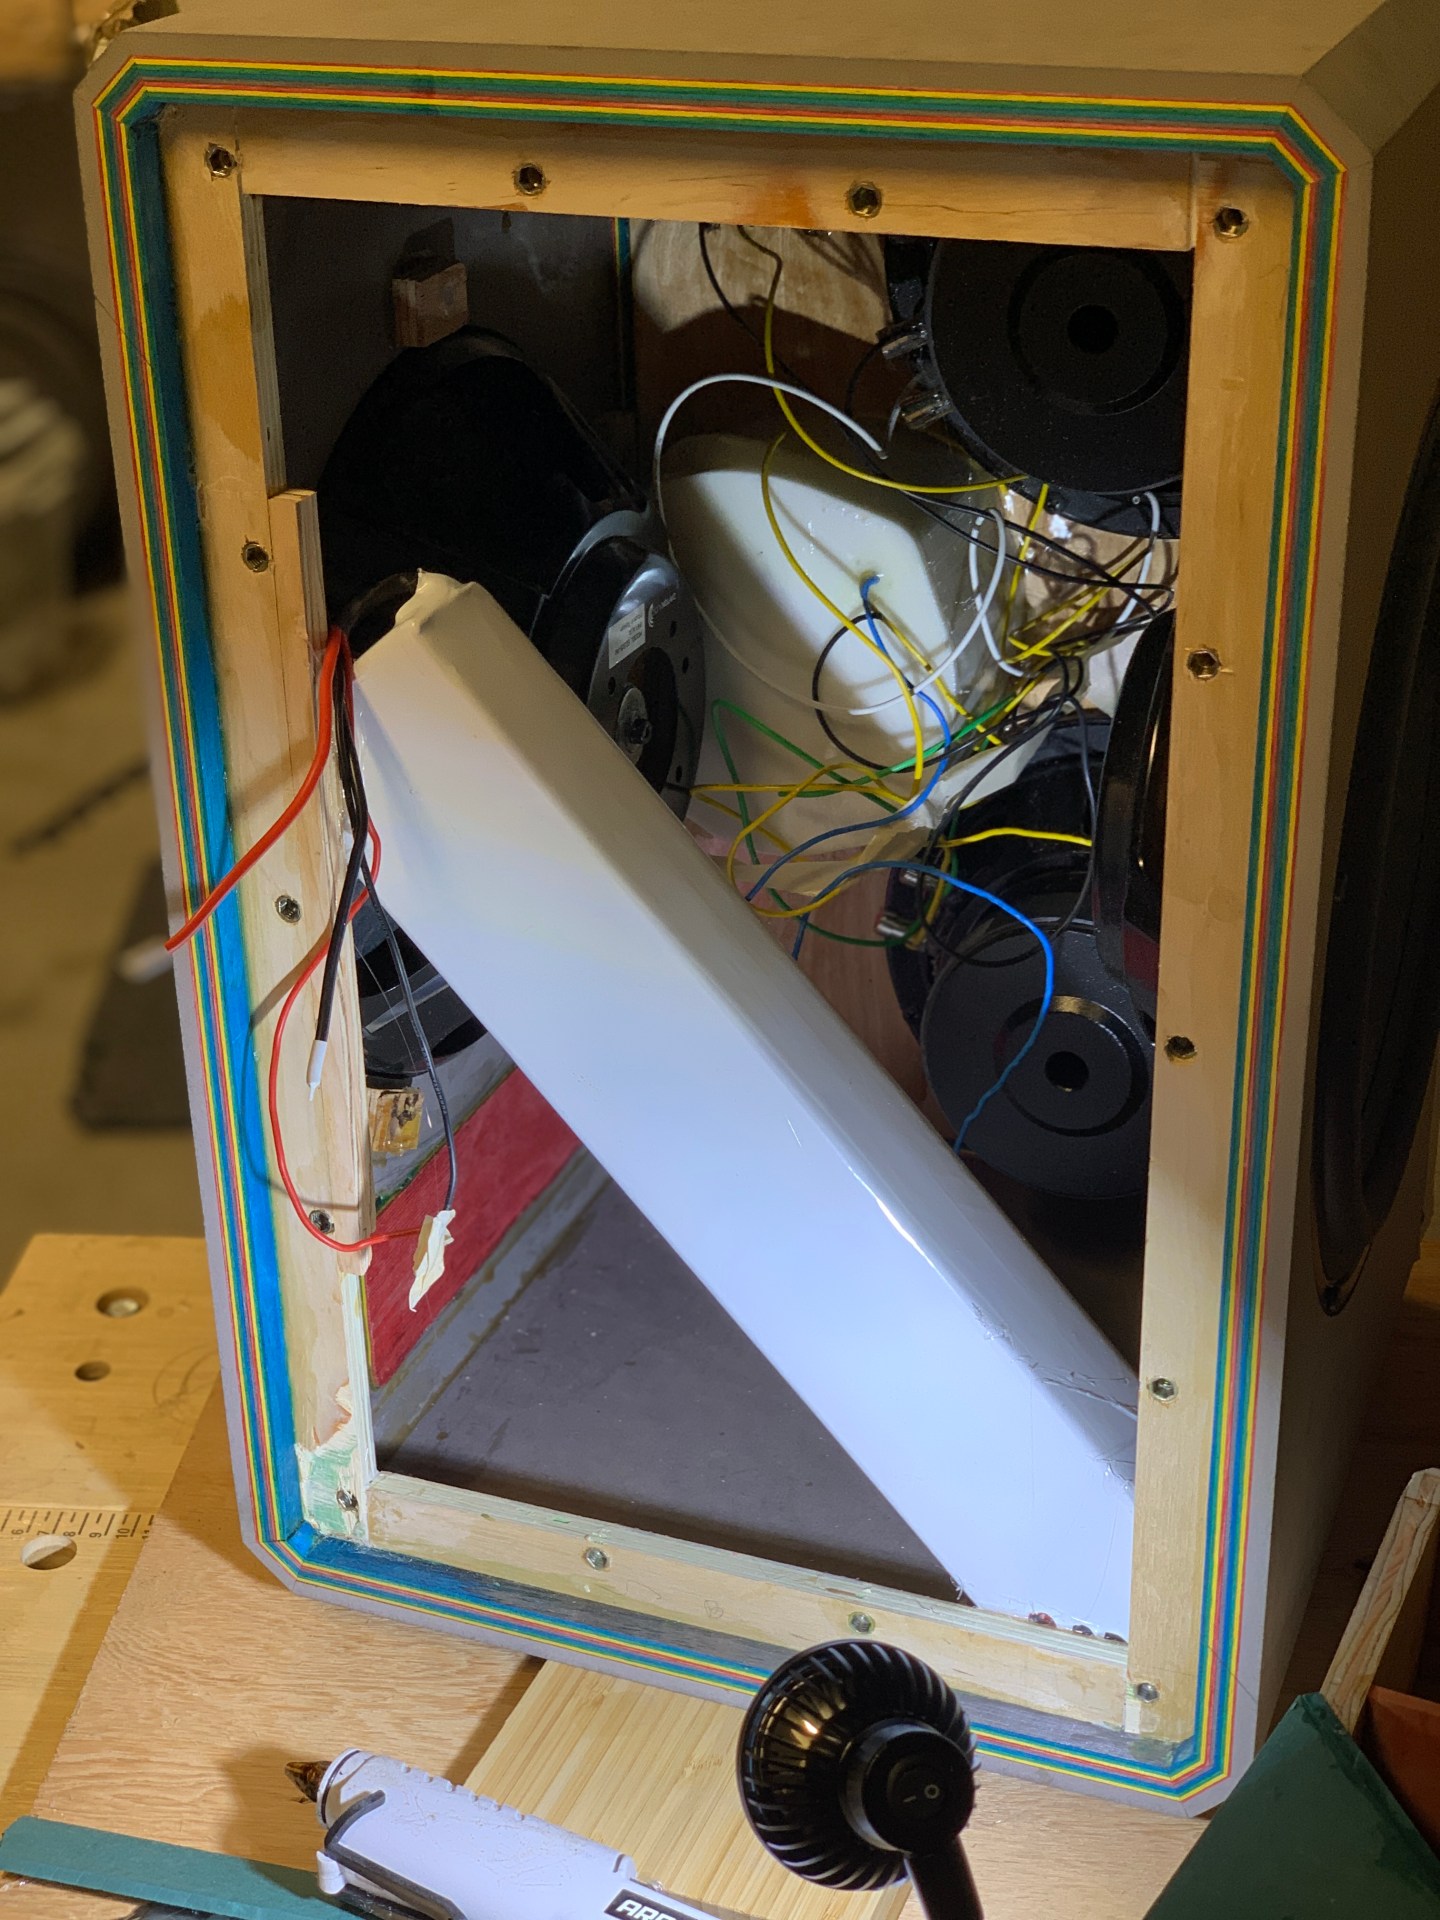
One thing not mentioned so far: a 20Ah 48v battery is massive. I had trouble fitting it into box in any orientation that did not interfere with the isolated electronics box, so I had to glue it in at an angle and take a chunk out of the electronics box:

DSP AND TUNING
SIGNAL CHAIN
The beauty of the TPA3255 by 3eAudio is that it runs a differential input which is massive for noise management. At the time, 3eAudio also sold a beautiful differential-out DSP board with an integrated Bluetooth chip. The integration of the BT chip eliminates BT radio noise at the source while the differential signal chain allows the removal of any injected EMI or ripple noise on the voltage sources.
This nearly fully integrated solution simplifies a lot of the process for creating a low noise signal chain. The amps themselves have a 12V line to run the DSP off of! However, I ended up forgoing this 12V rail for something much more ridiculous (see noise section)
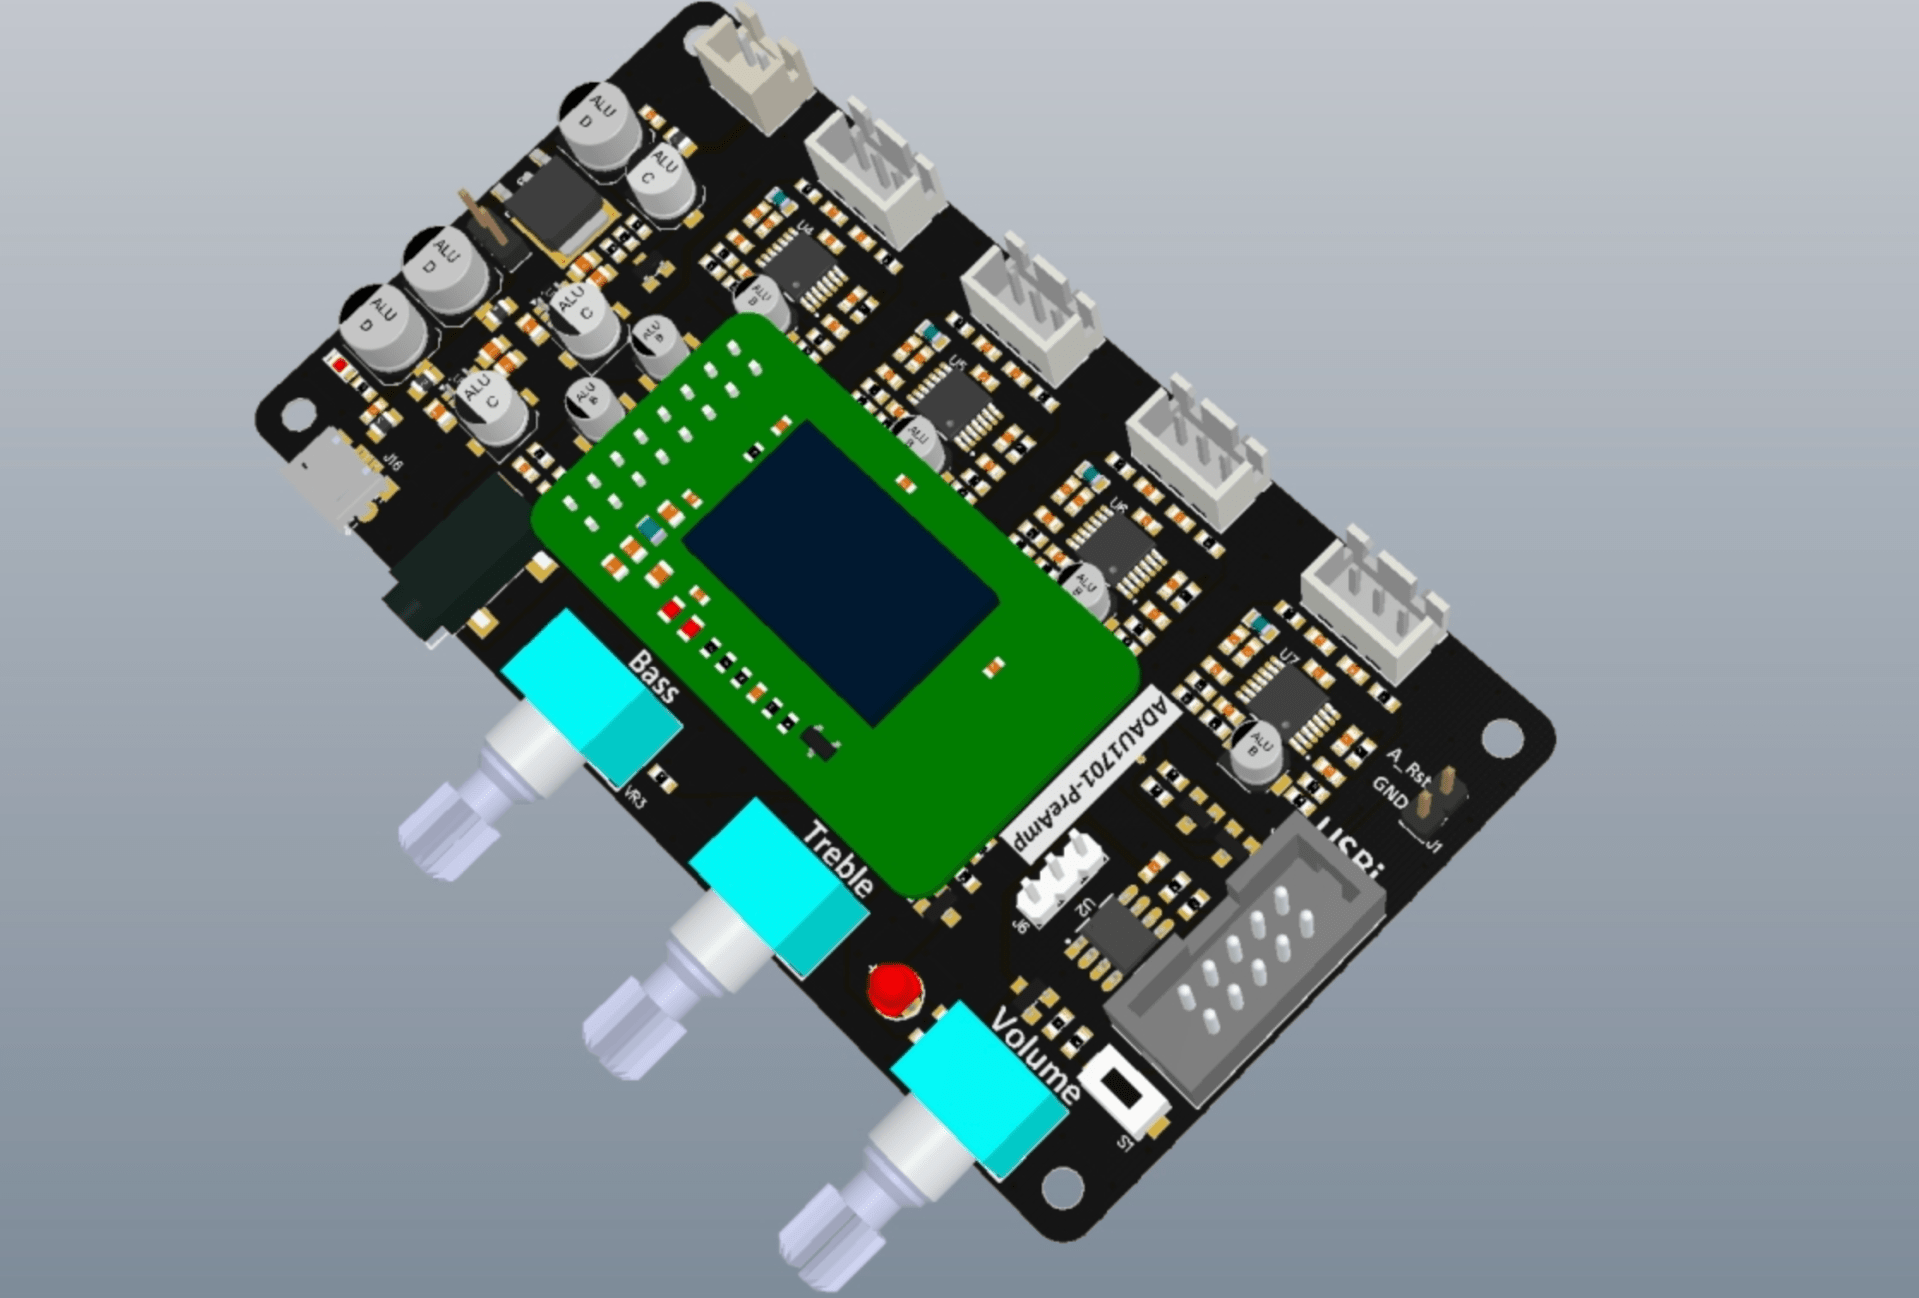
Tuning with ADAU1701 is a breeze once you figure out SigmaDSP’s interface and how to write to EEPROM (hint: you have to right click).
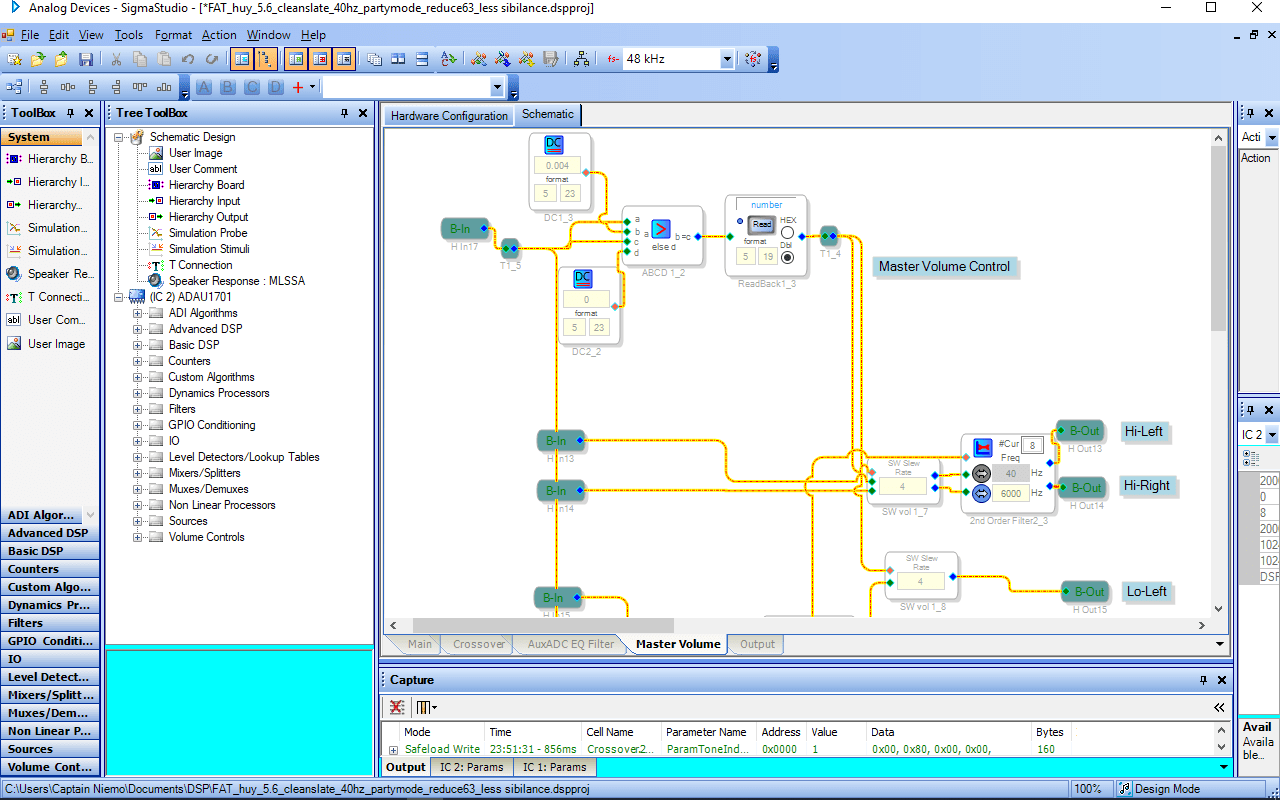
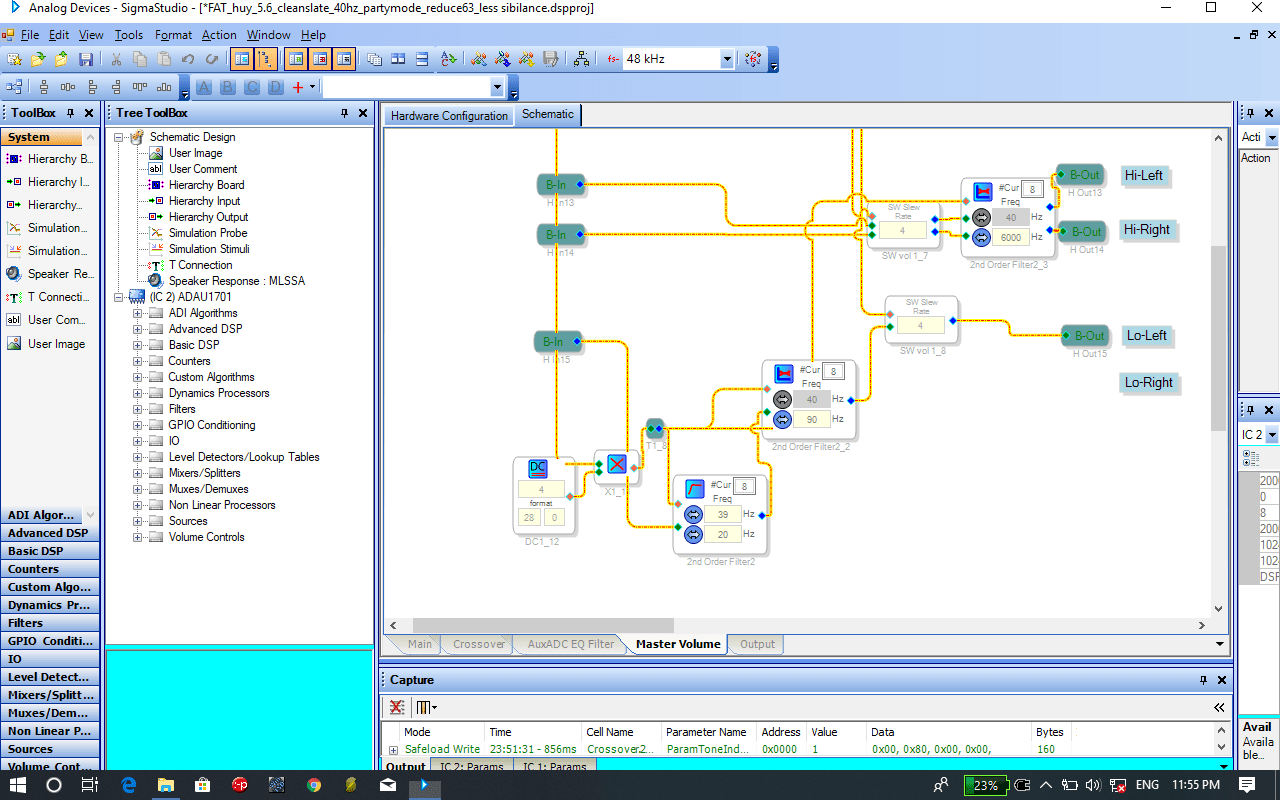
Here’s an overview of the DSP employed to get this beast of an acoustic system sounding good at all levels:
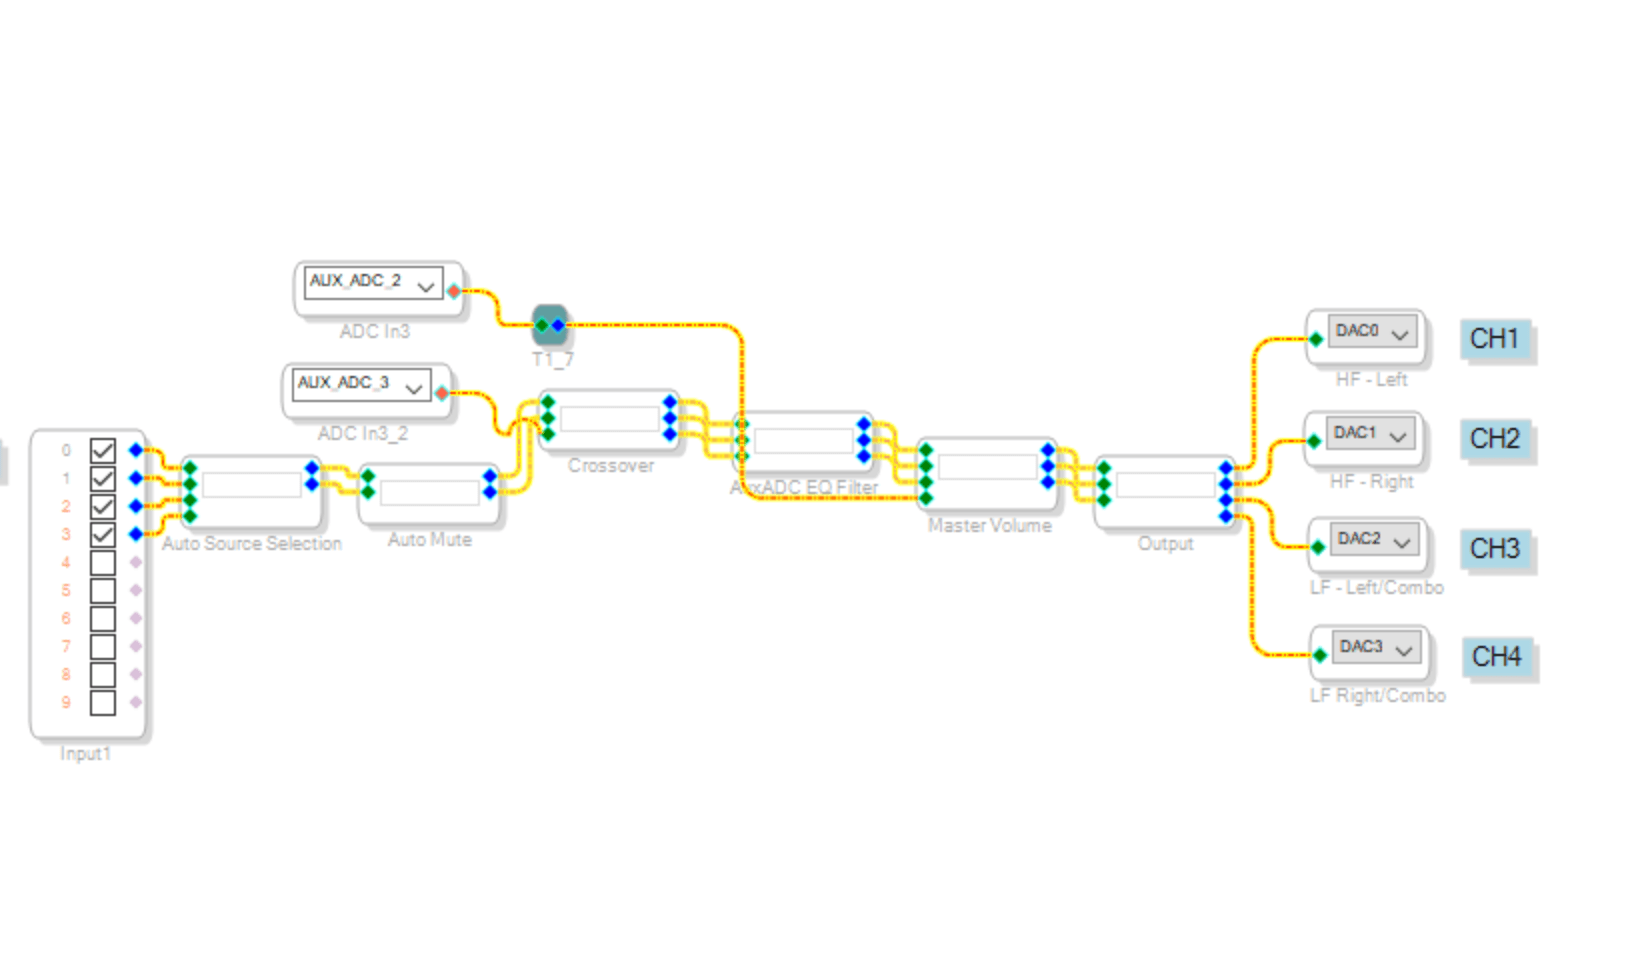
The first block labeledx-over handles several global EQs as well as some volume-tone compensation. Here’s the signal flow:
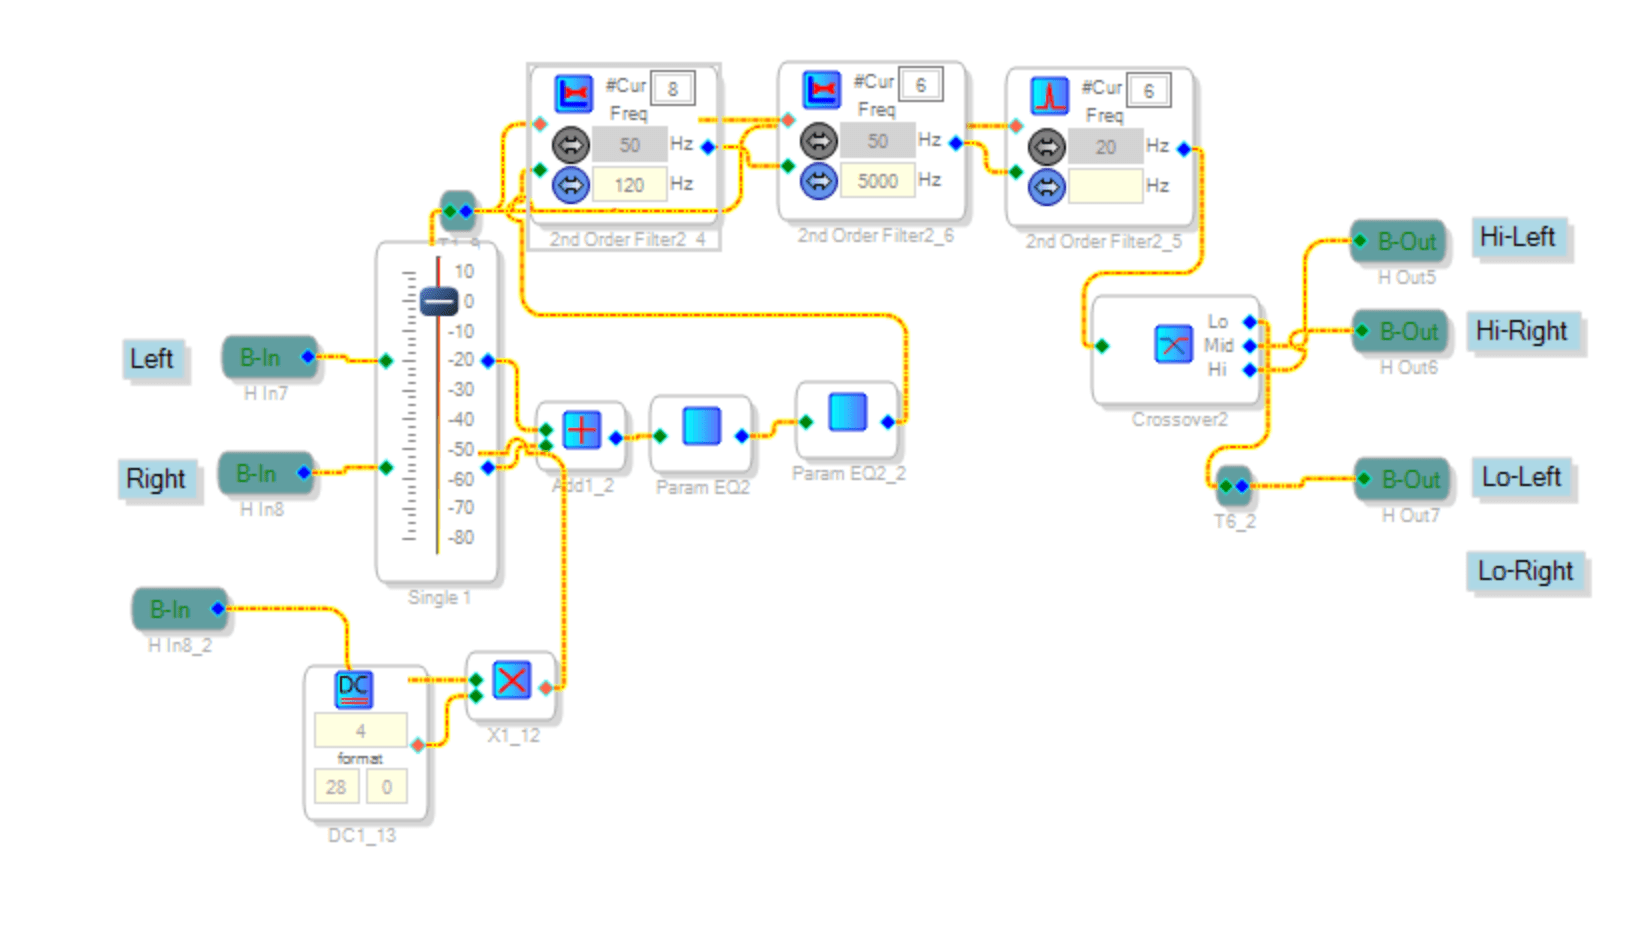
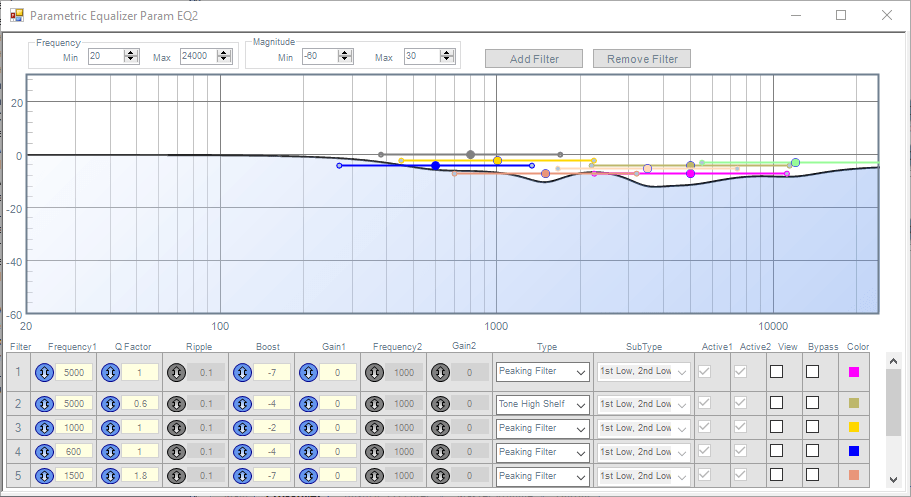
Inside the first parametric EQ, the analytical for the midrange and tweeter takes out the resonance peaks (occurring from horn loading, and the rear-mounted design of the mid-range).
Inside the second EQ block is an absolute mess of peaking filters to carefully control the excursion and system resonances of the woofers and the woofer box.

After the parametric EQs are a bunch of volume control filters which have a very specific and unusual function: to enable party mode. The intent of the party mode knob is to shape the output of the whole system to be focused on higher output. Ideally, the whole system has been tuned for a very pleasant Hi-Fi response, with rich, deep bass, balanced vocals, and sizzling highs. But sometimes you just want a little extra punch, and that’s what party mode is for.


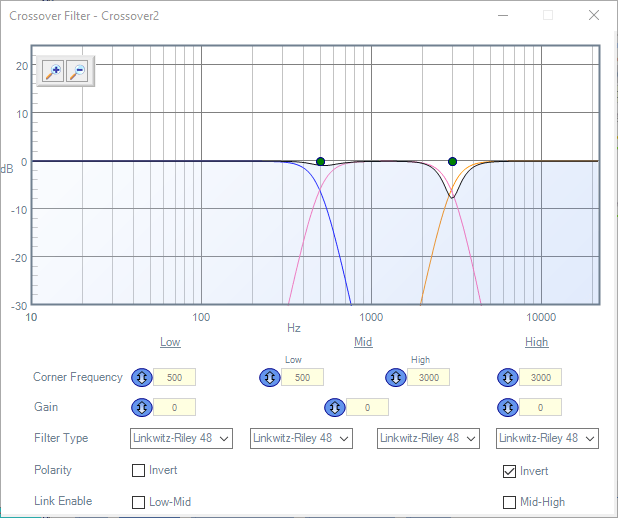
X-over, as low as possible for the midrange and tweeter to limit directivity effects. Two notes:
- Typically crossovers are a bit higher for this kind of application (800-900Hz), I am of the personal preference to push crossovers as low as possible for better efficiency and directivity. Generally I think the worry for low crossover is either distortion due to high excursion at resonance, but with careful calculation and proper DSP, this can be easily avoided.
- The LR alignments often prefer a phase inversion for the TW for proper summation, which can be confirmed in real life by measuring in the farfield.
Moving on the the next section: the master volume!
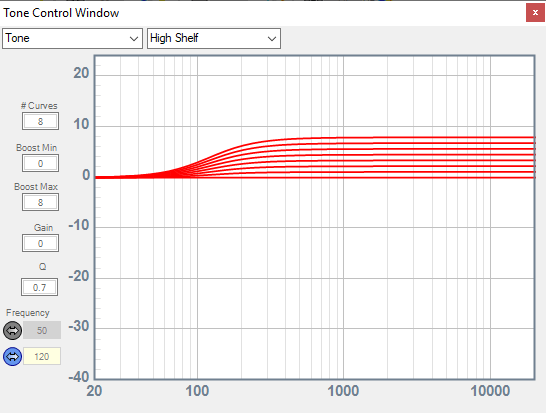
These essentially are optimized to allow maximum excursion at a variety of levels, while also respecting the equal-loudness contours (in short, our perception of a “flat” frequency response changes with a change in output level; lower listening levels require more bass/treble to sound balanced). The HP filter moves down as volume moves down, while the low shelf increases LF gain, allowing deep bass at lower listening levels and controlling over excursion at high levels. A similar behavior is required for high frequency.
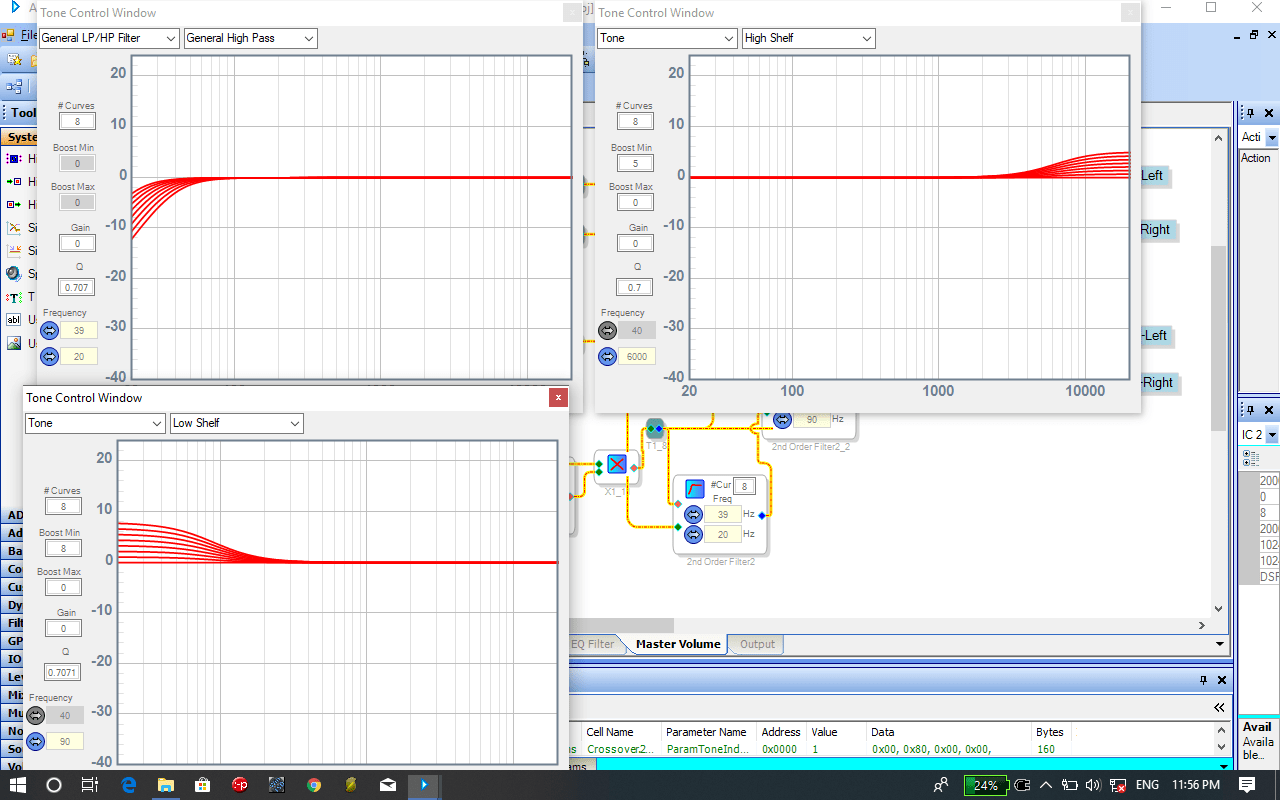
Finally, the output stage requires some gain reduction for the more sensitive mid-range/tweeter, an overall lowpass for the subwoofers, and a soft clipper to limit digital distortion:

THERMALS, NOISE AND ACCESORIES
THERMALS
While in theory the idle losses of the TPA3255 (2.5W) should only imply a 6°C rise with Junction-to-ambient thermal resistance of a fixed 85°C heatsink, it turns out that 1) thermals are much more complicated than that and dependent on a multitude of design factors 2) in reality the TPA3255 with a heatsink gets quite hot at idle.


Further still, the power dissipated by the amplifier rises non-linearly with output power, and at the (woofer) rated 600W total output power, the amplifier will be dissipating nearly 90W in heat. While 600W is the upper boundary (consider duty cycle, crest factor, etc), again, in practice, what I observed is that the amplifier gets hot hot. For instance, standard wire (PVC) temperature ratings are ~80°C which only allows a maximum output power of 100W total (assuming ambient at 25°C and an ideal heatsink).

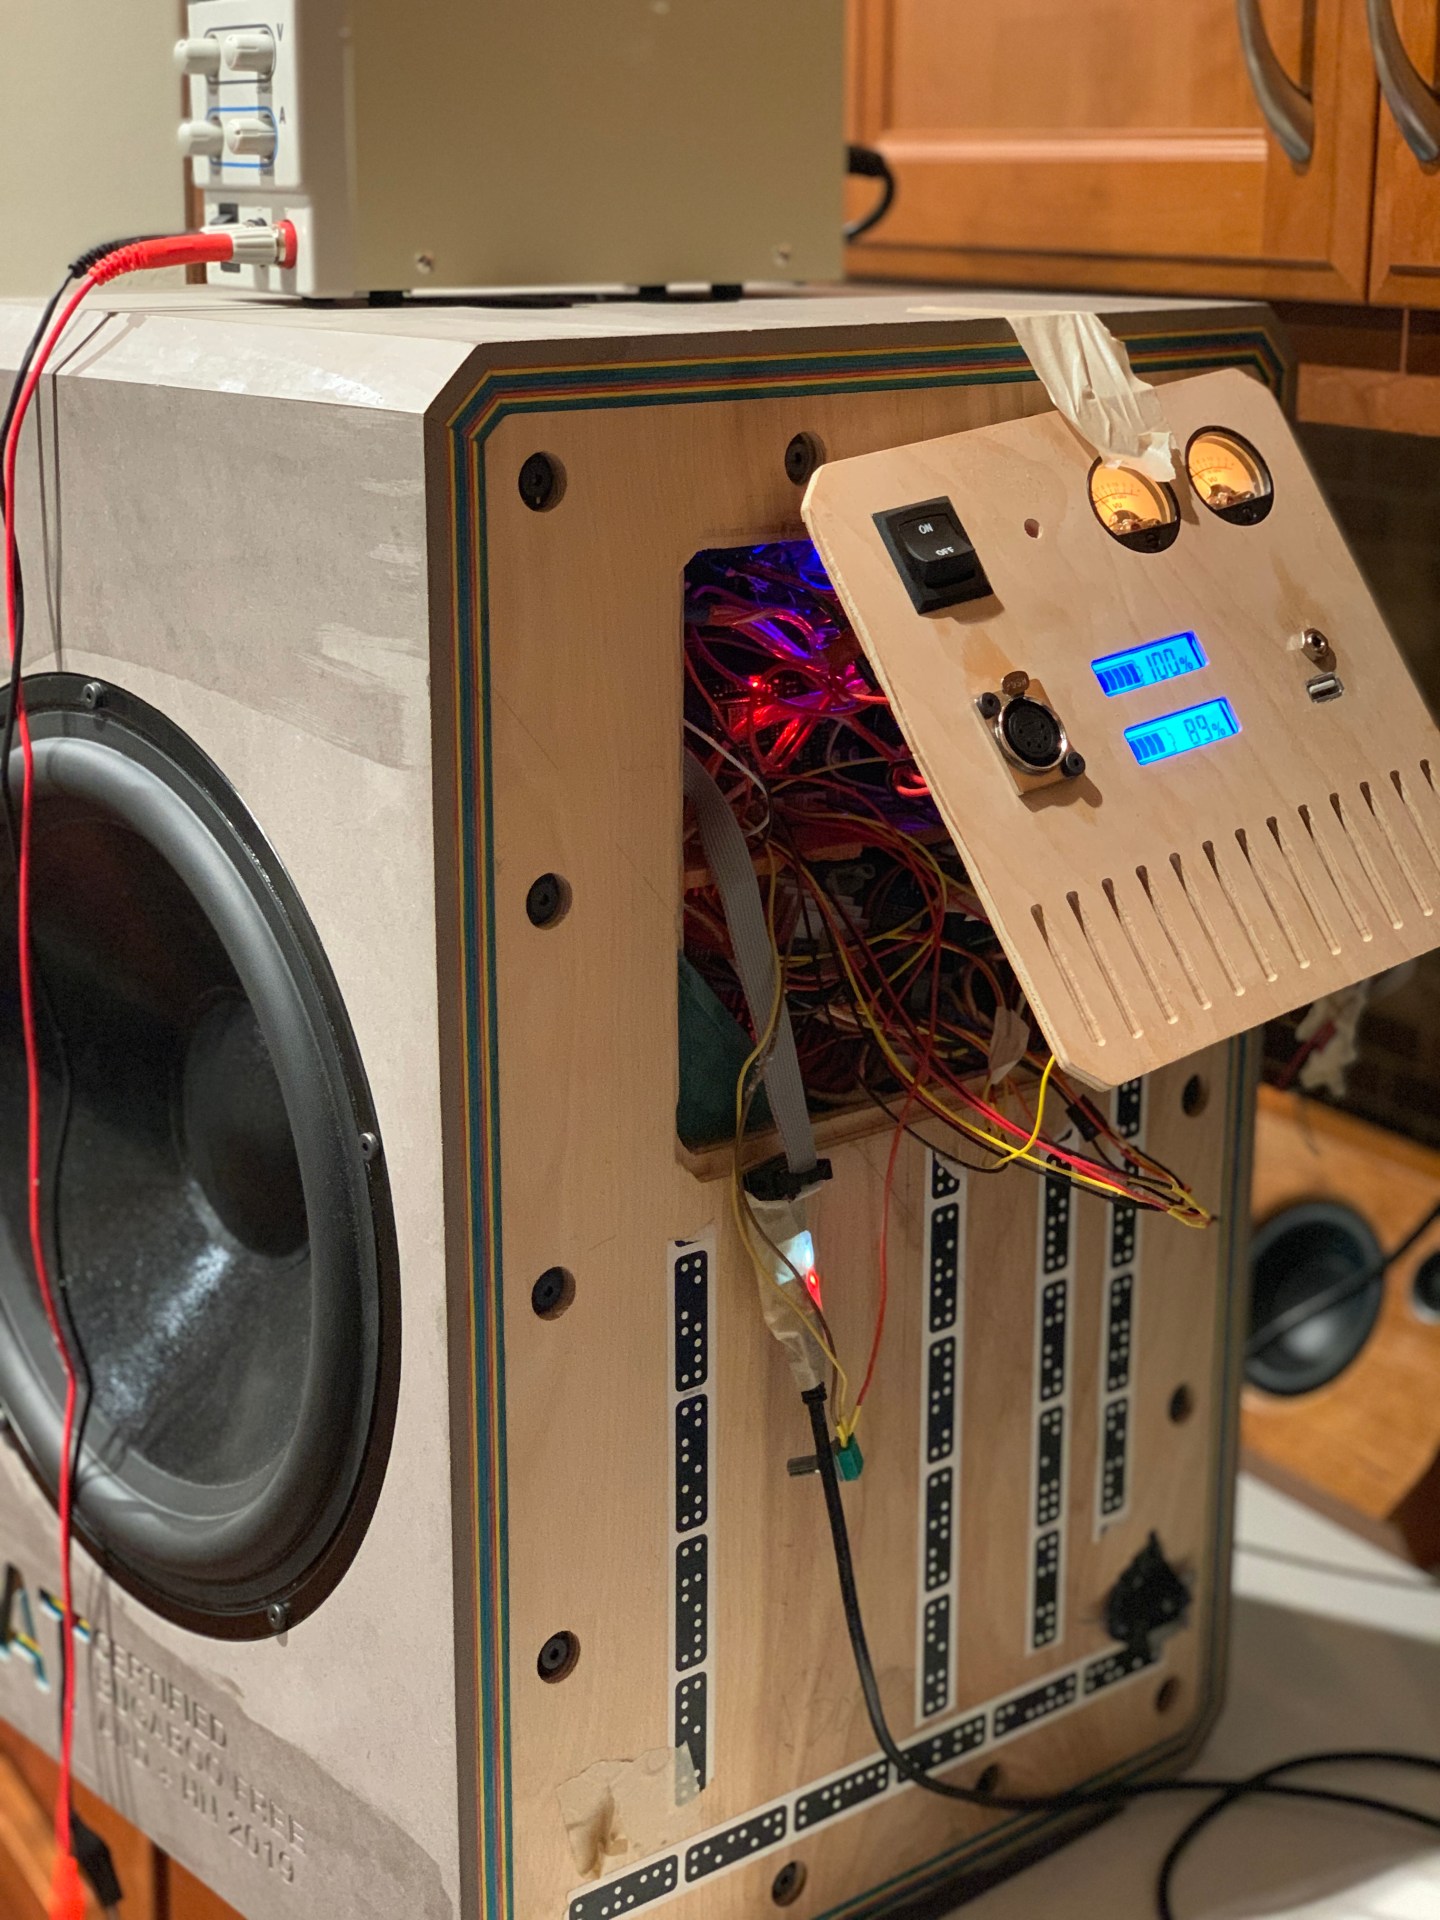
To combat this, I installed thermo-couple controlled 80mm case fans to the heatsinks, with exhaust vents in the electronics box, to enhance the heat dissipation capacity of the system and prevent heat-soak. I also upgraded some the wiring for this project to silicone-sleeved wires, which besides tasting great being luxurious in quality and feel are much easier to route, handle and bundle.

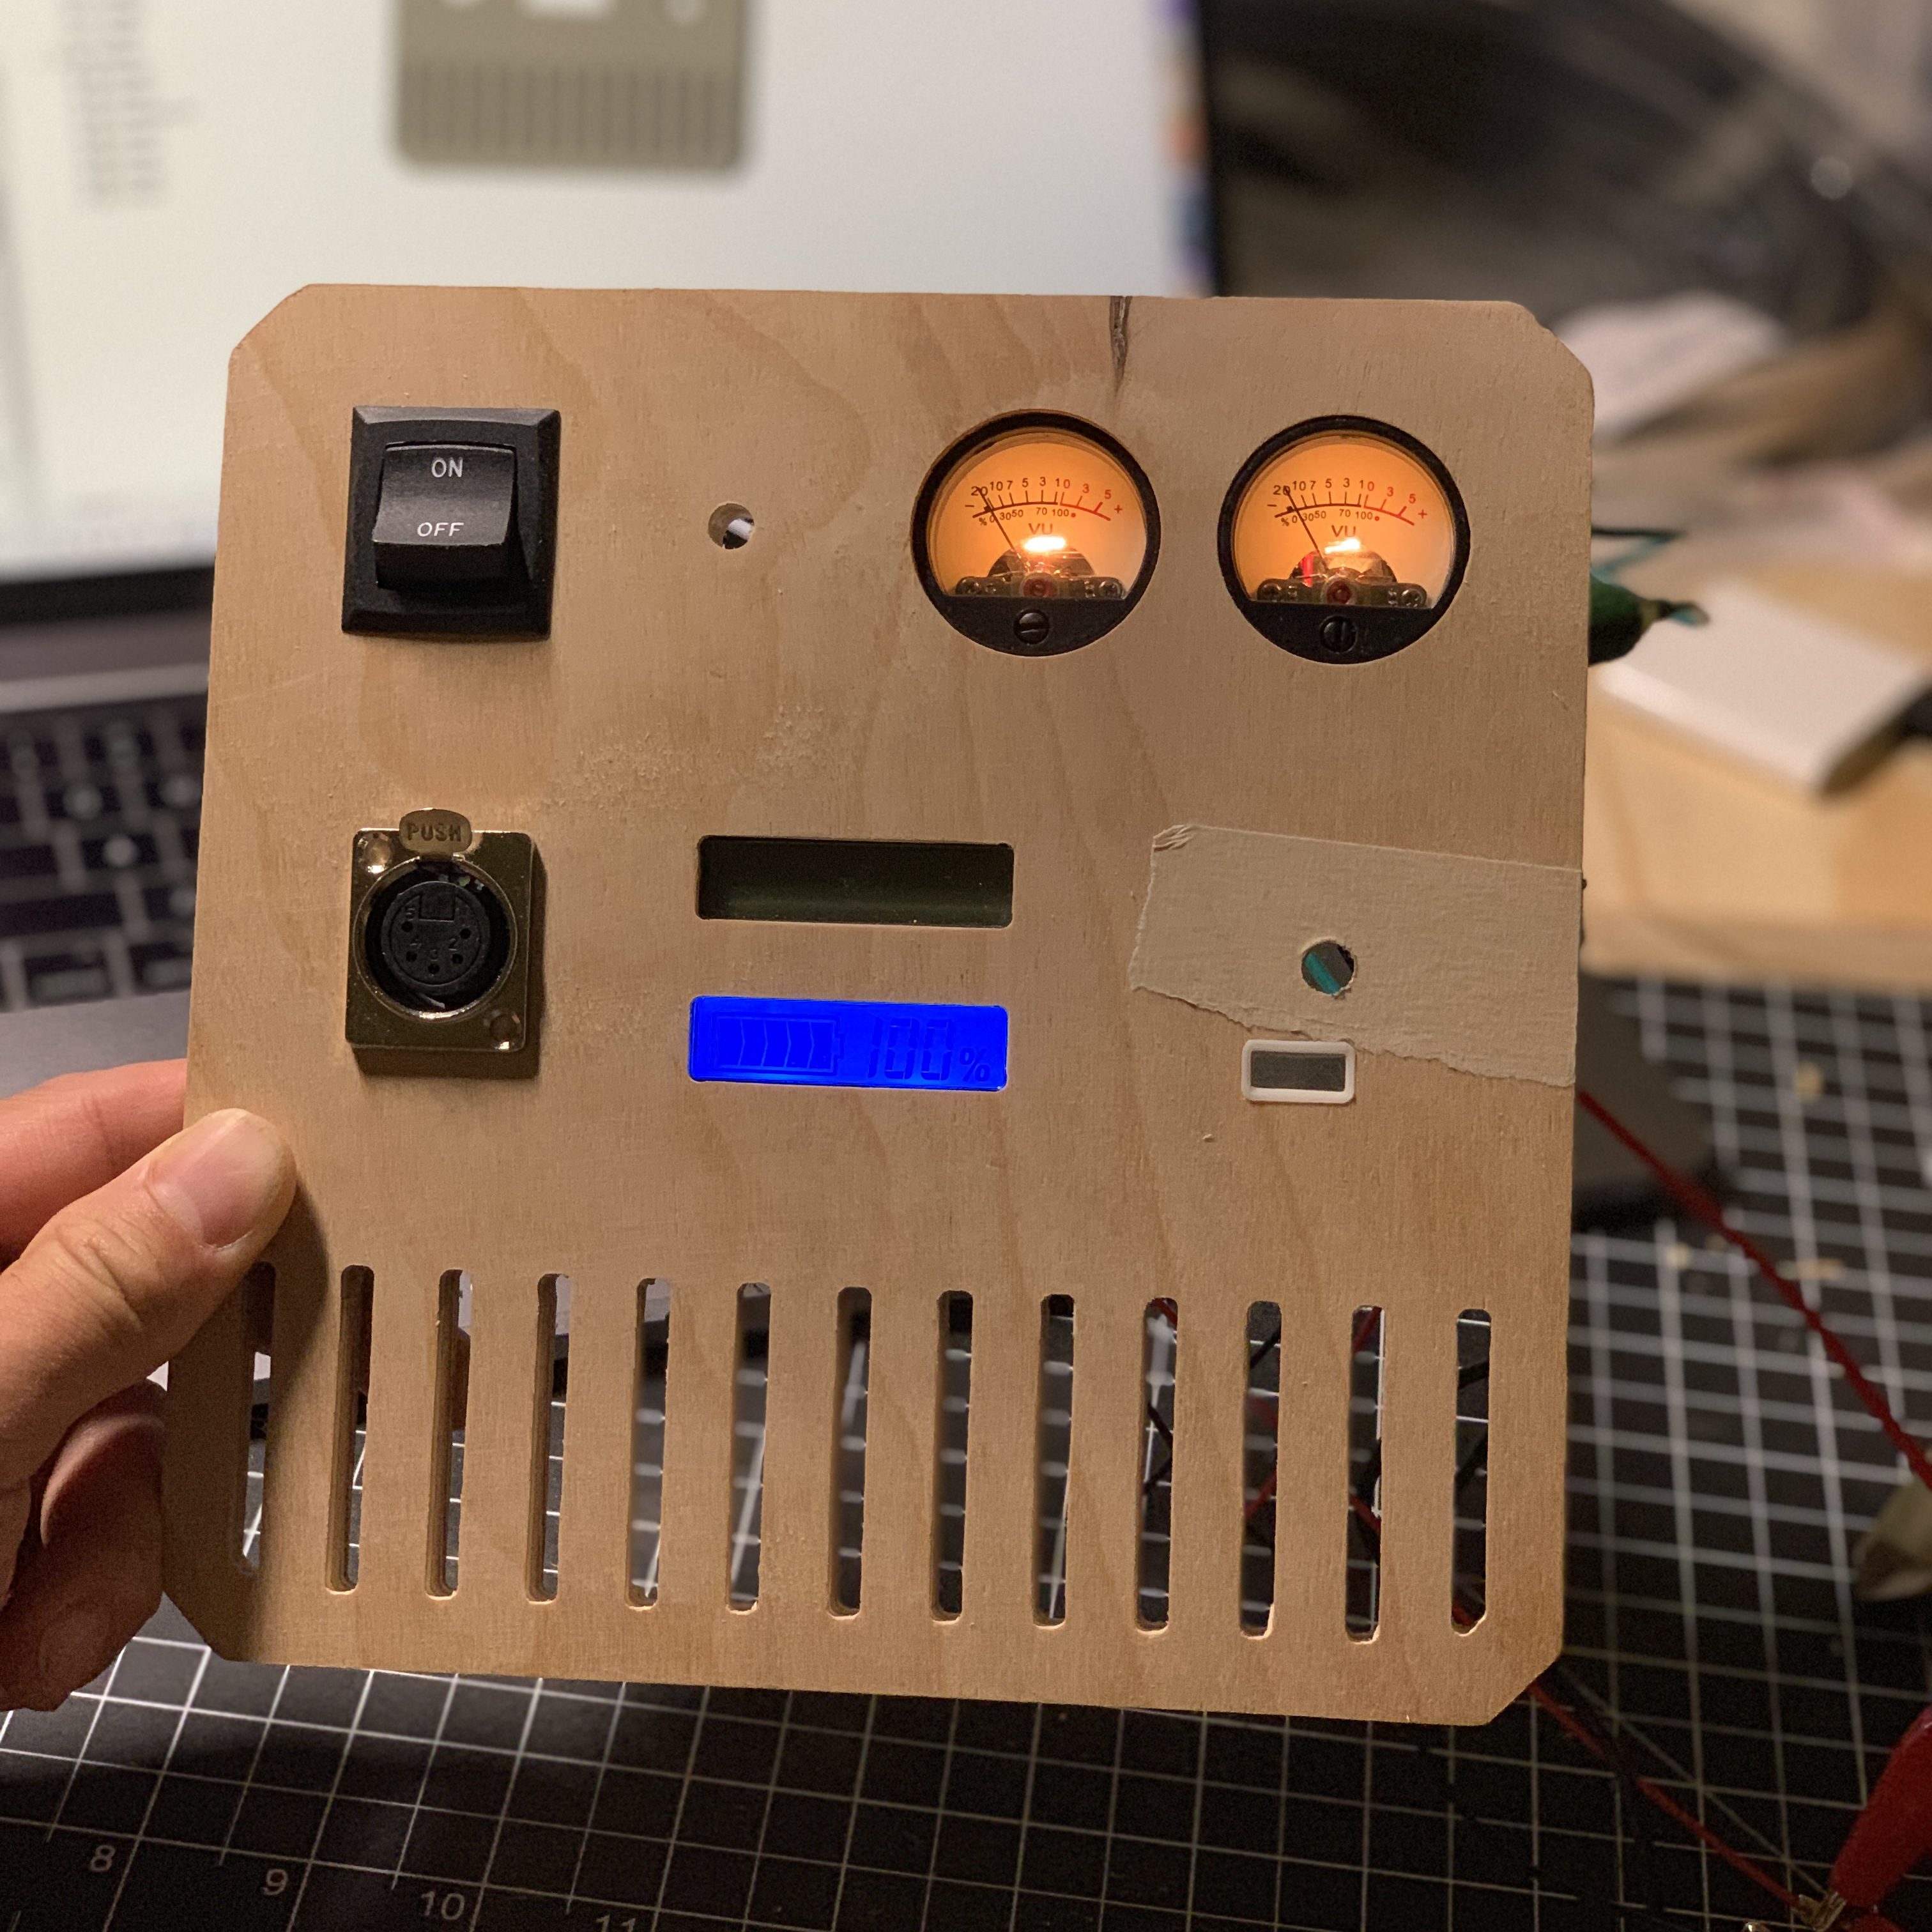
ACCESSORIES AND NOISE
The fans themselves consume enough wattage that the TPA3255 onboard 12V line was not sufficient. I also wanted a battery meter, and a backlight VU meter. I trialed a HV DC-DC step down to run all the 12V auxiliary bits; in most applications, I would use a simple low noise buck converter like an LM2596, but these tap out around 36V. To step down the 50V battery voltage, I had to find specialty voltage converters, but the ones I found for reasonable prices tended to inject too much noise into the signal path. Due to the high gain and high efficiency of the acoustic section, the whole set up caused tons of quiescent noise, which only increased with the power draw of the aux electronics (e.g. fans). So I opted for a truly ridiculous solution.
‘DC-DC converters do come in various flavors of ground-loop isolation, ranging from 0 isolation (cheap) to kV of isolation (very expensive for higher ampacity), but you know what’s cheap and intrinsically highly isolated? A completely floating power supply.
Having lost all sense in the pursuit of FAT bass, I built a separate 3S battery pack to run all auxiliaries which has the advantage of excellent isolation and the massive disadvantage of added complexity. In addition to having to have two battery management boards, two separate grounds, carefully calculated battery capacities, the device now requires two separate chargers and a 4-pin charging connector.
But it was all worth it for the VU meters, which flick to the beat independently:
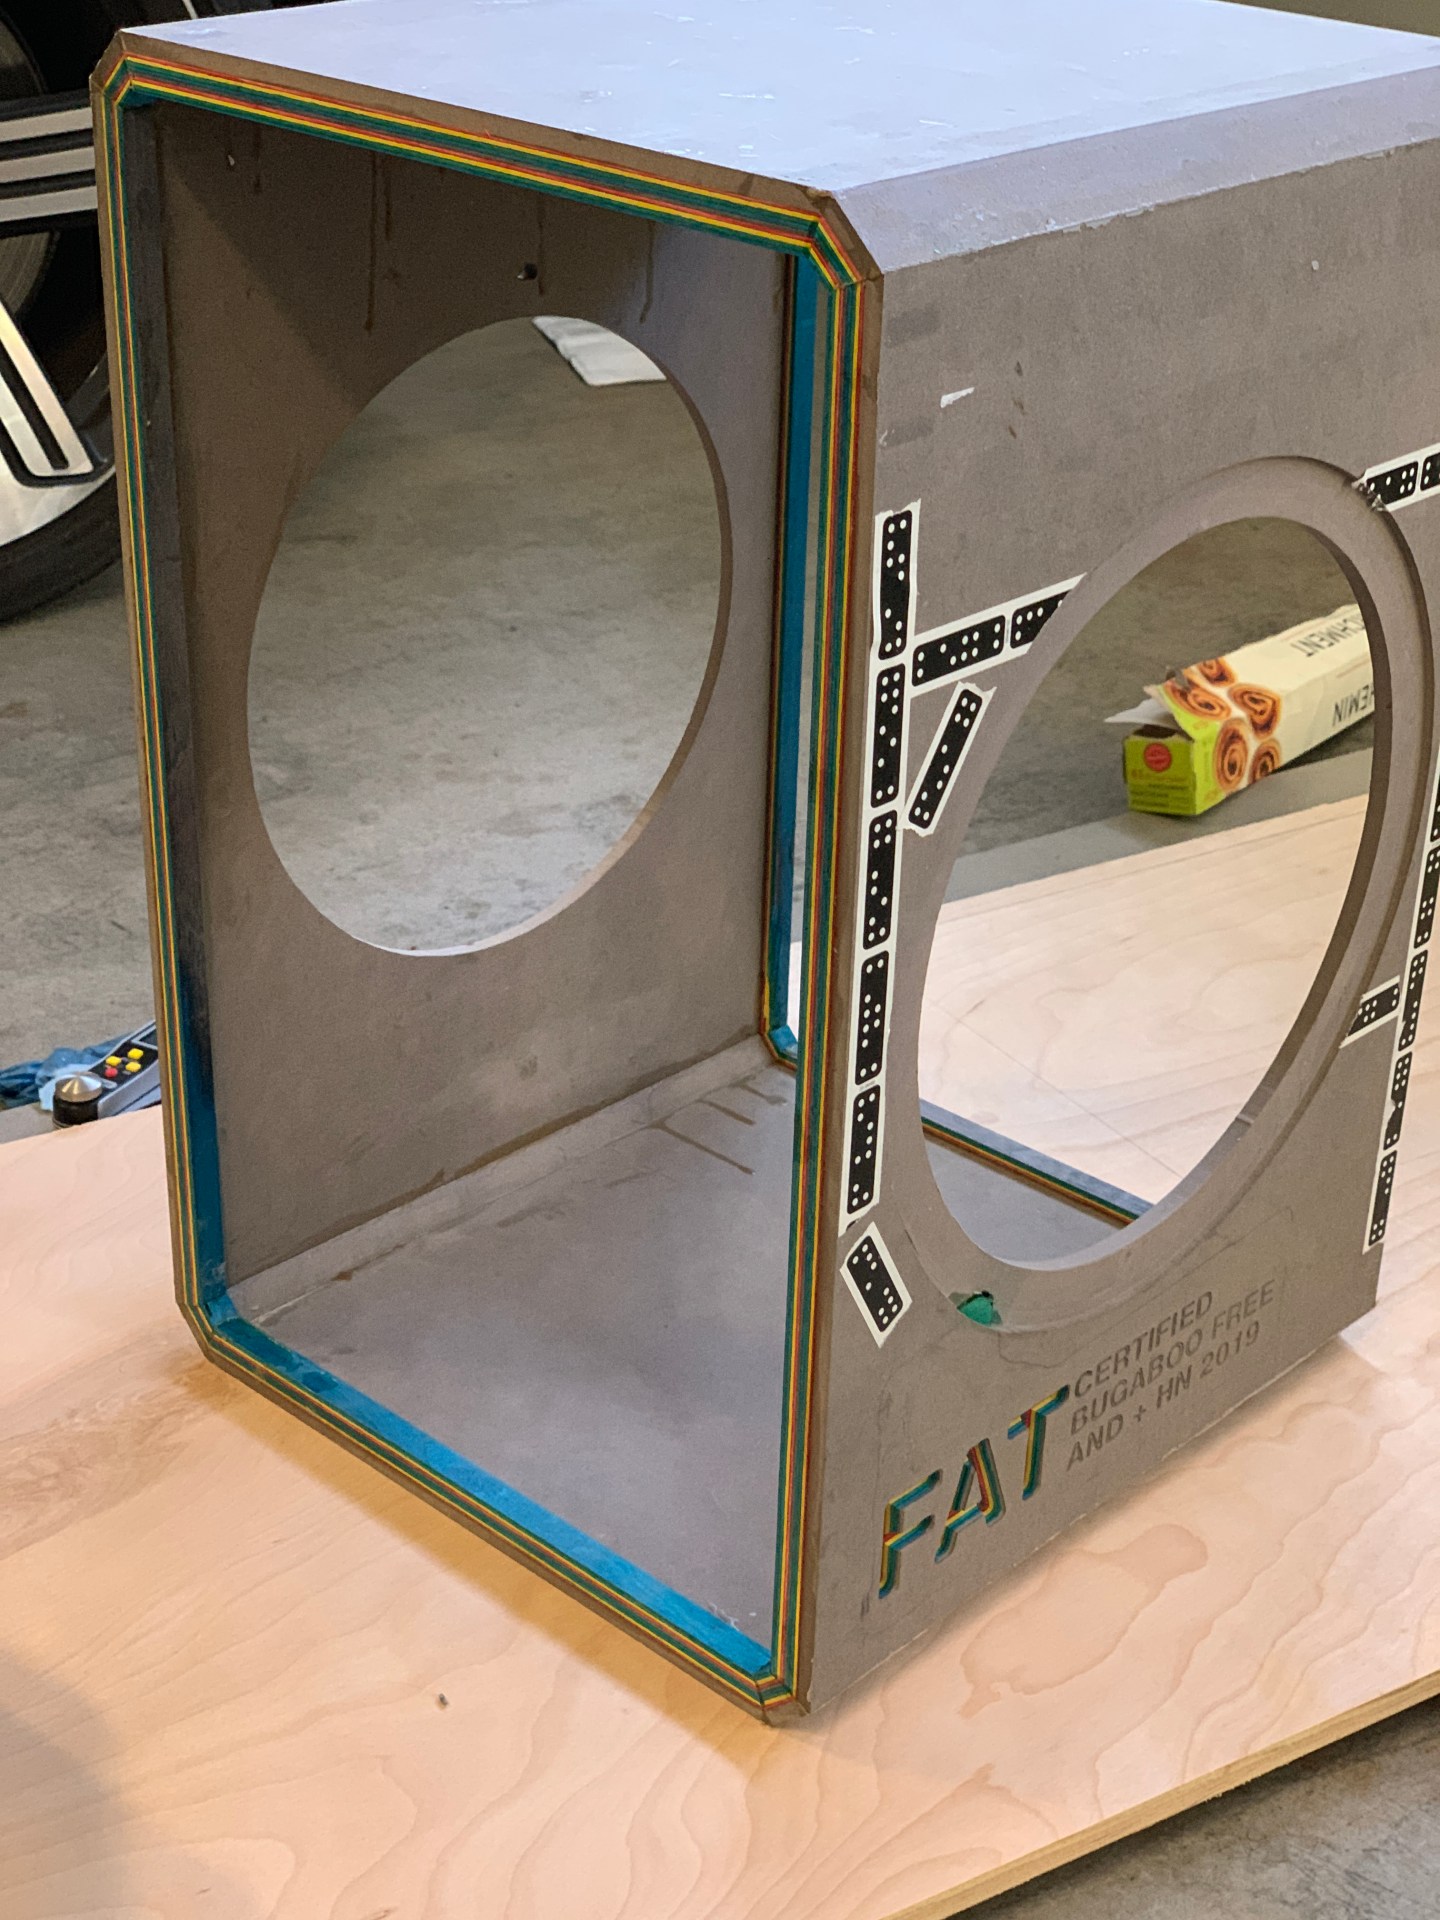
FINISHING THE BUILD
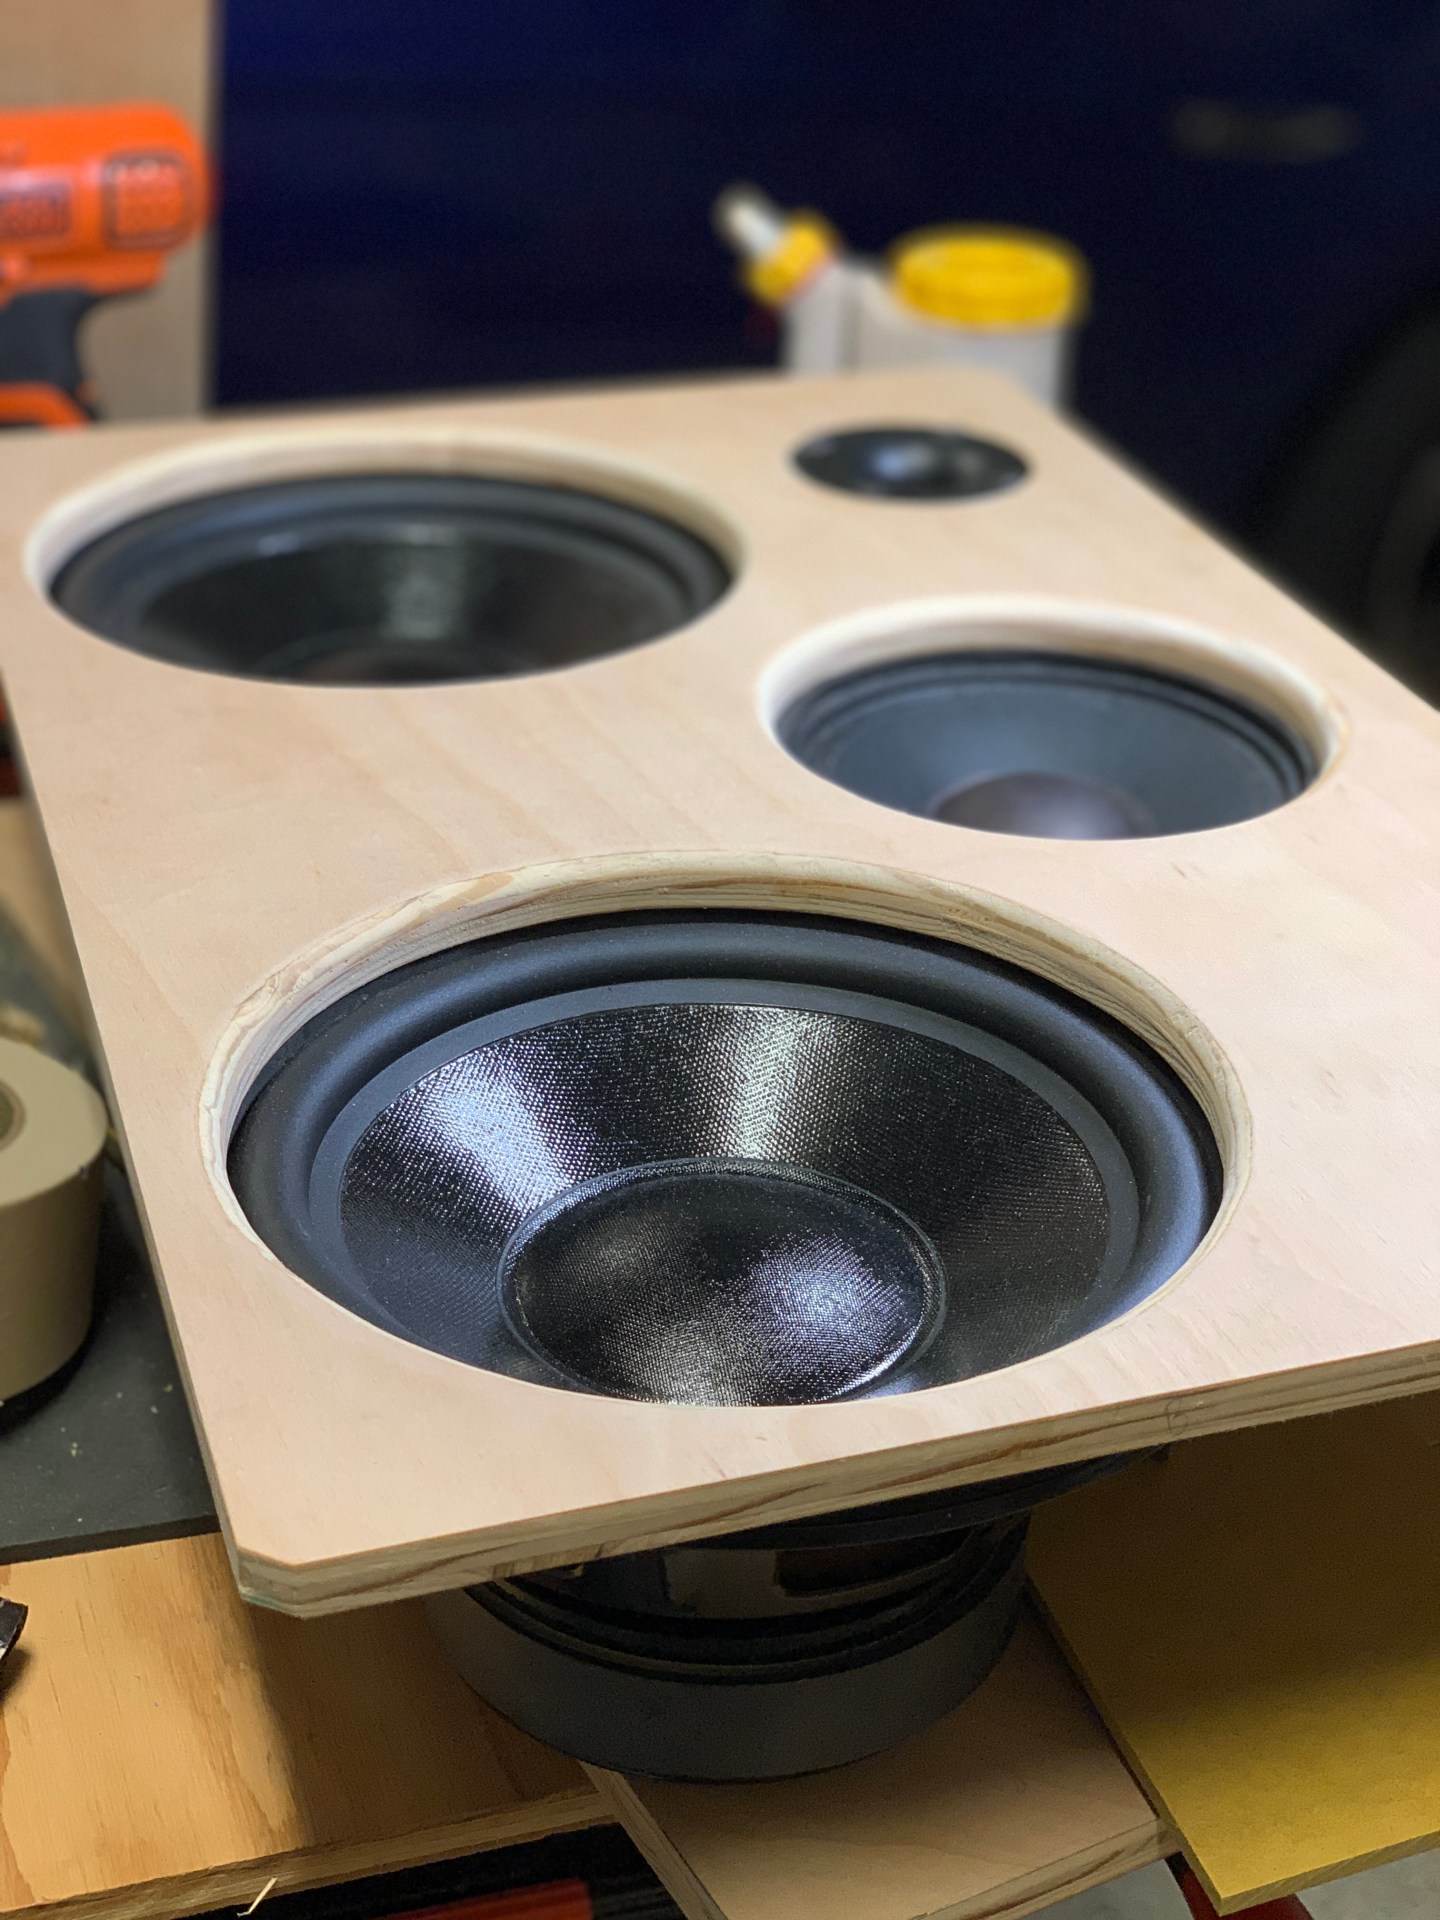
At this point, all that was left was to put everything together

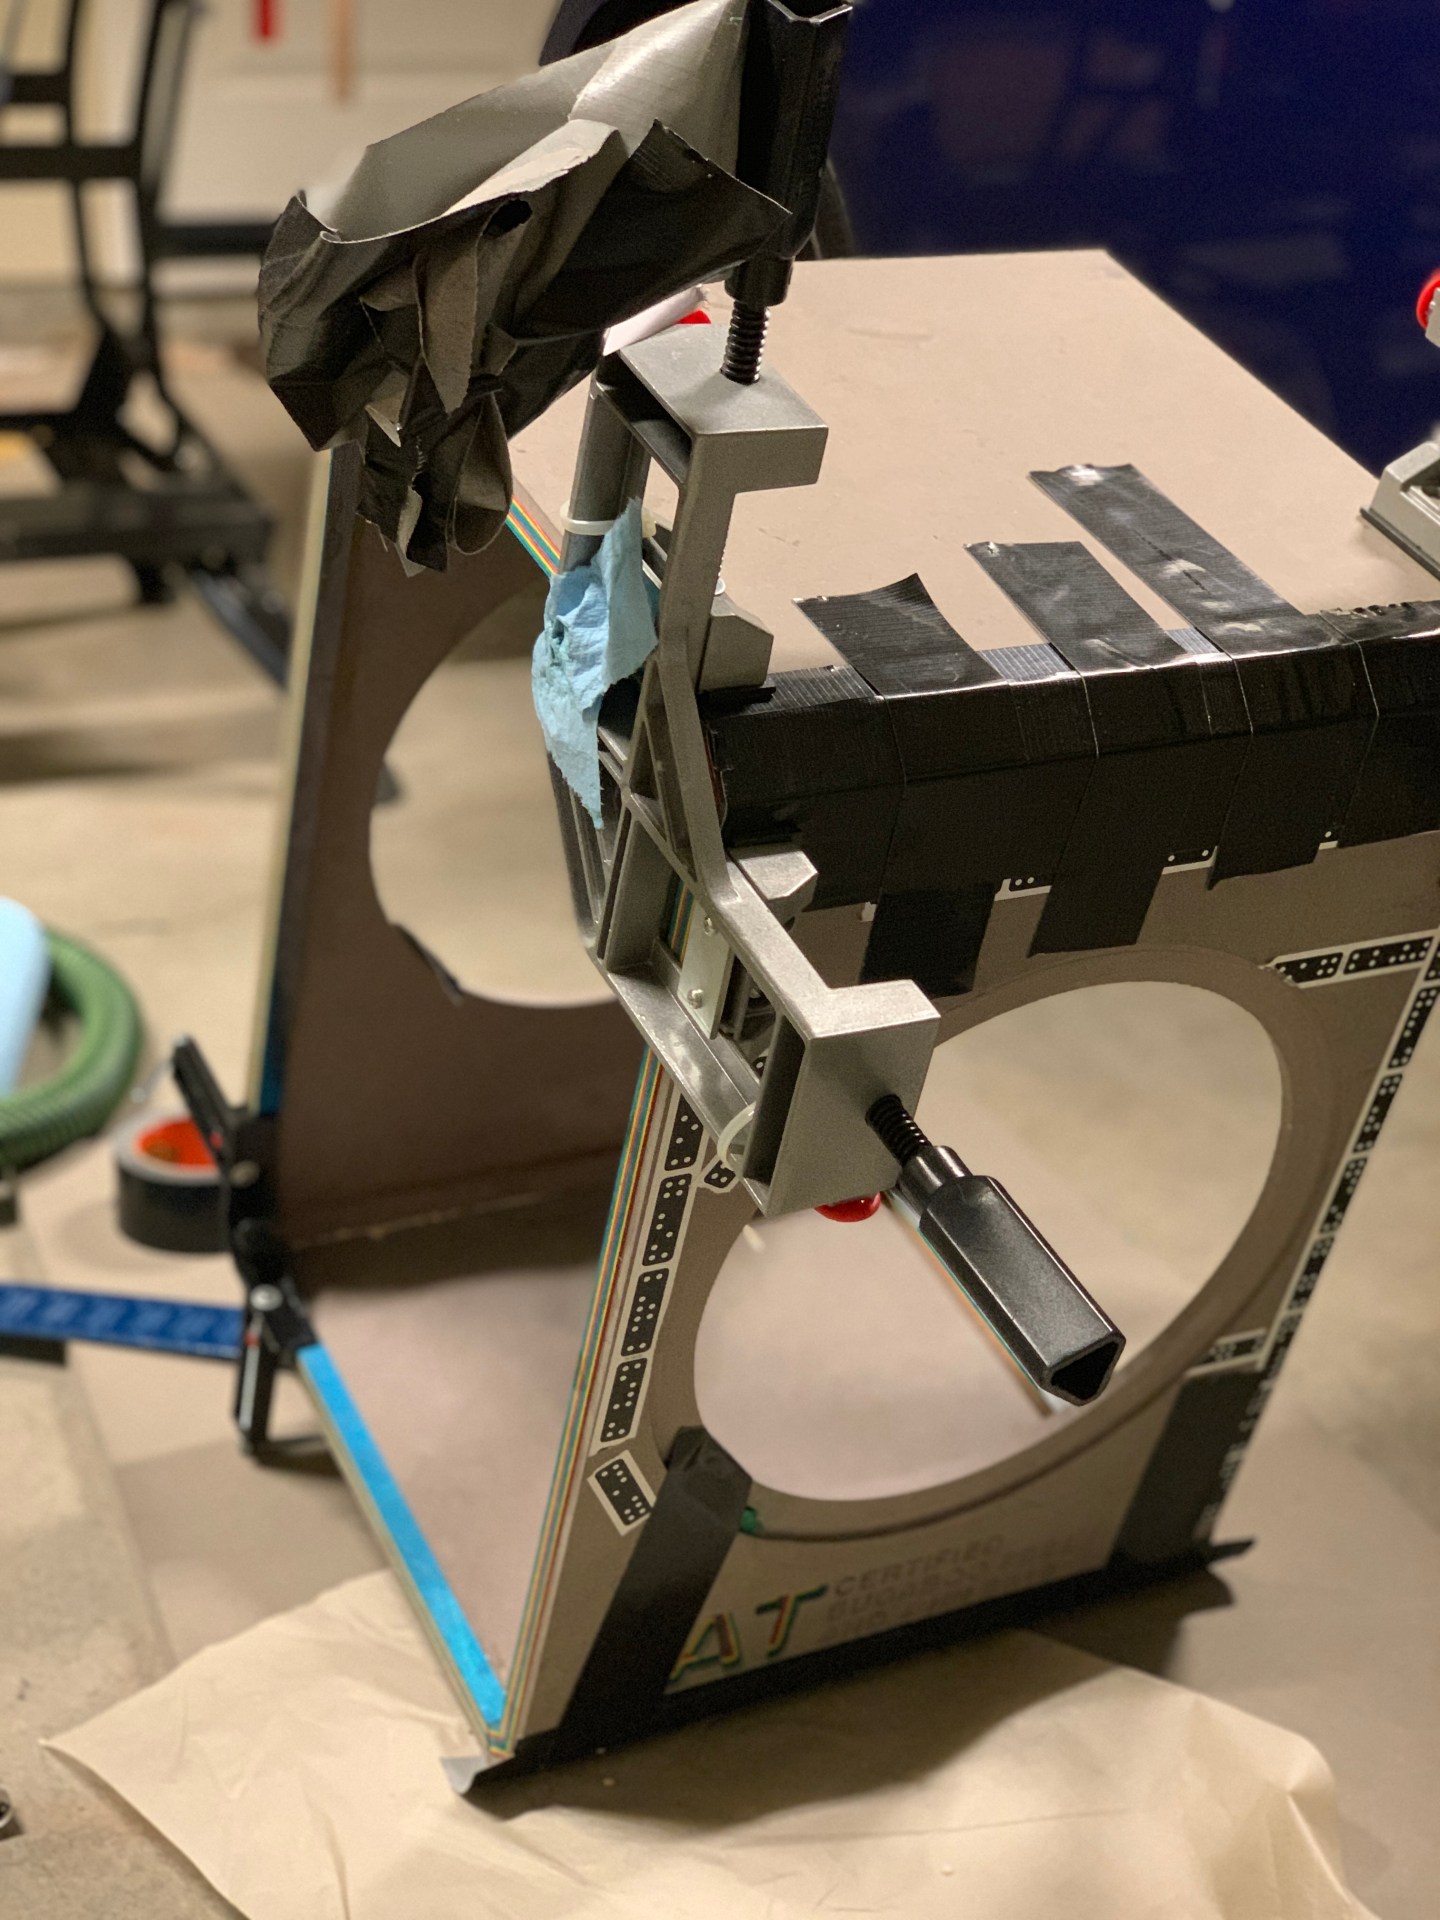
Testing the cut outs for the rear electronics panel:

The VU meters look amazing:

Adding stuffing, and a mess of wiring

The wiring can only get more messy

Sound testing before finally assembly:
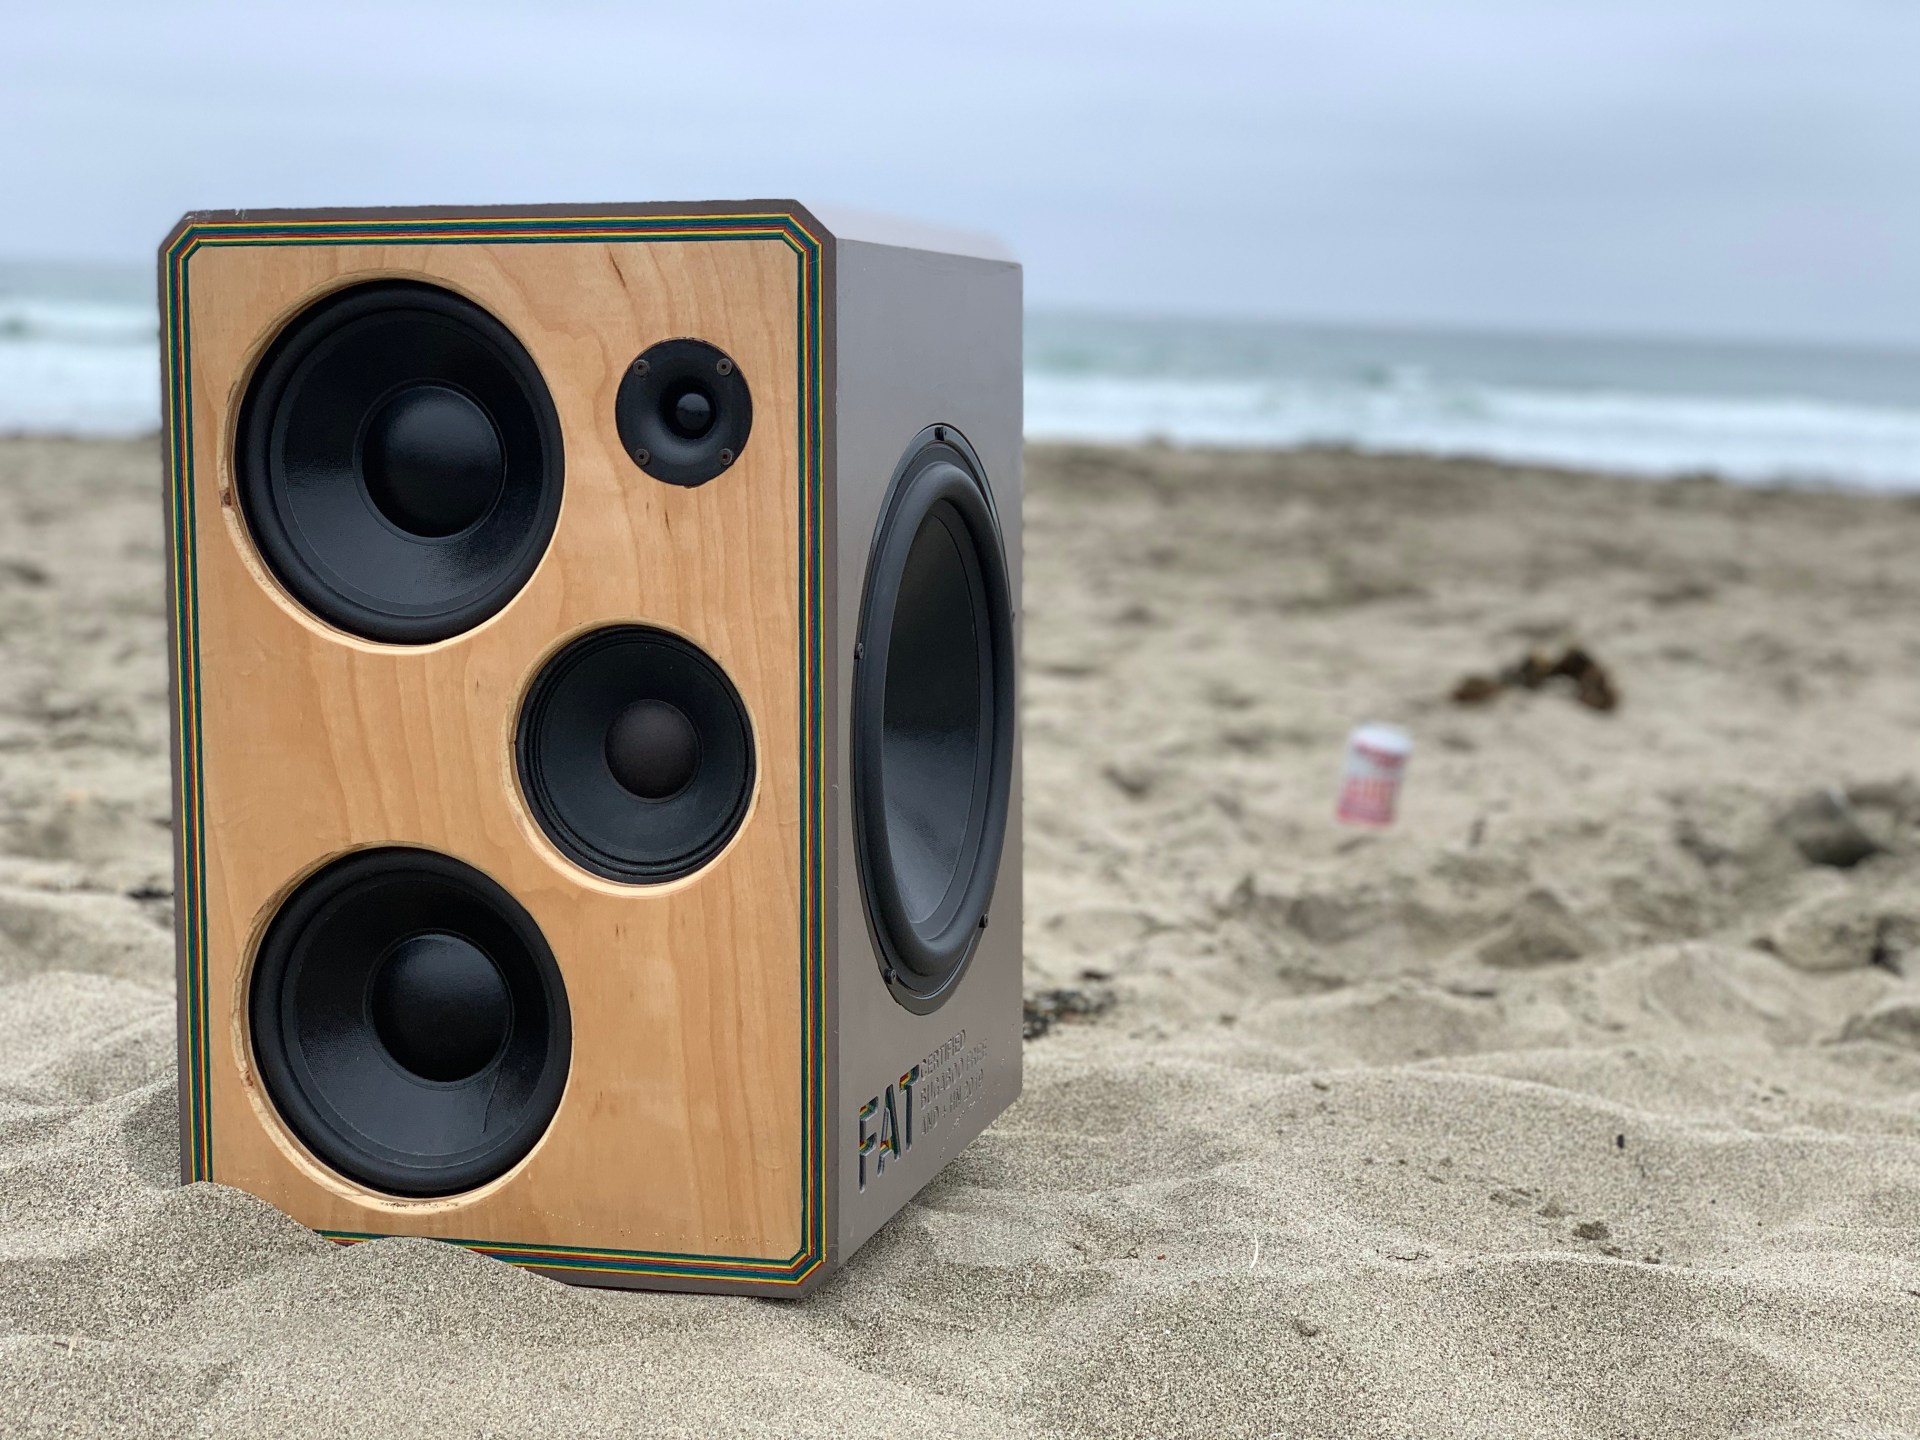
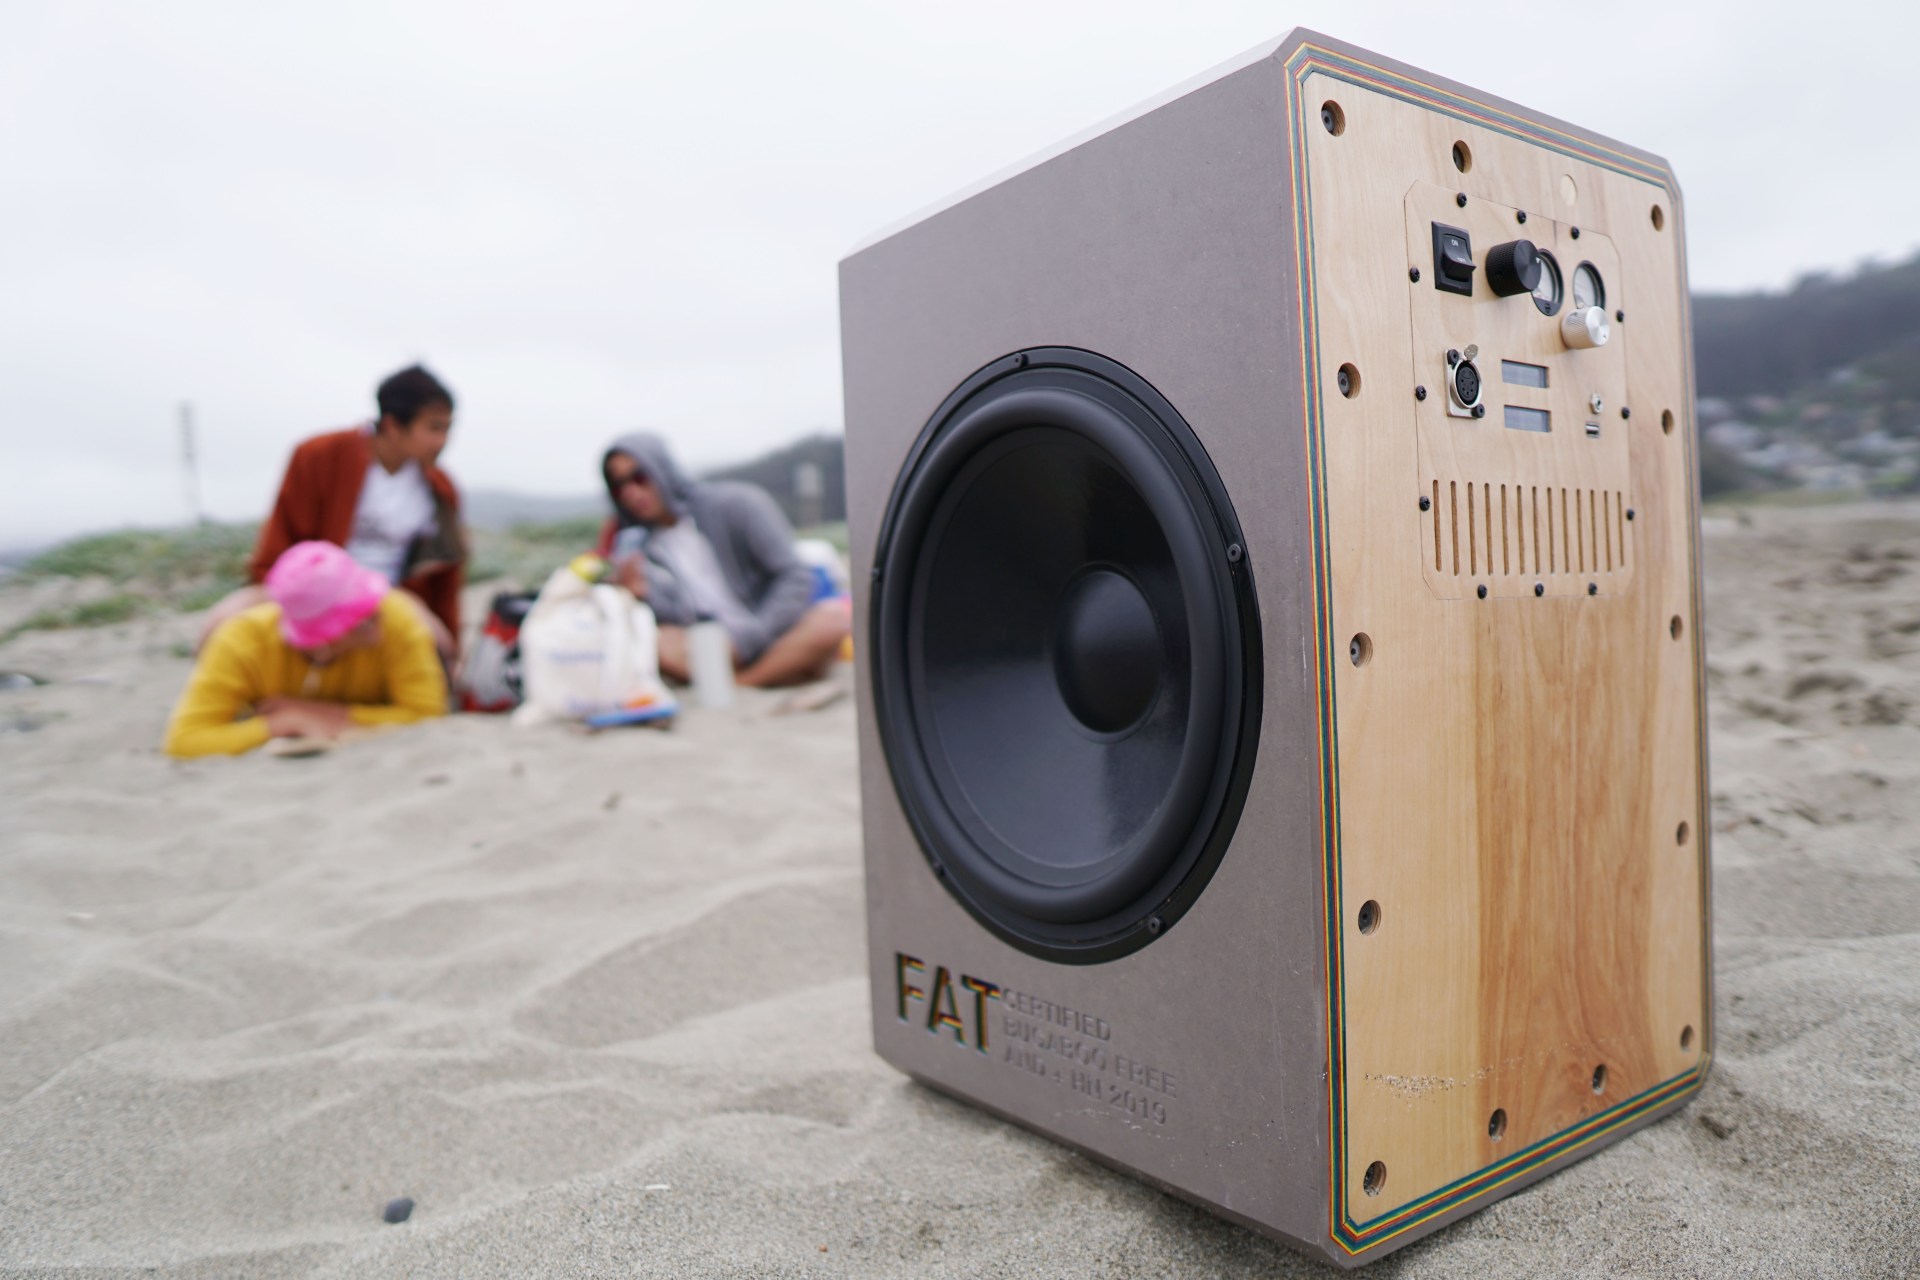
Finished product: